1. Navigating the Tasks Page
Navigation: Global Overview > Manage > Tasks
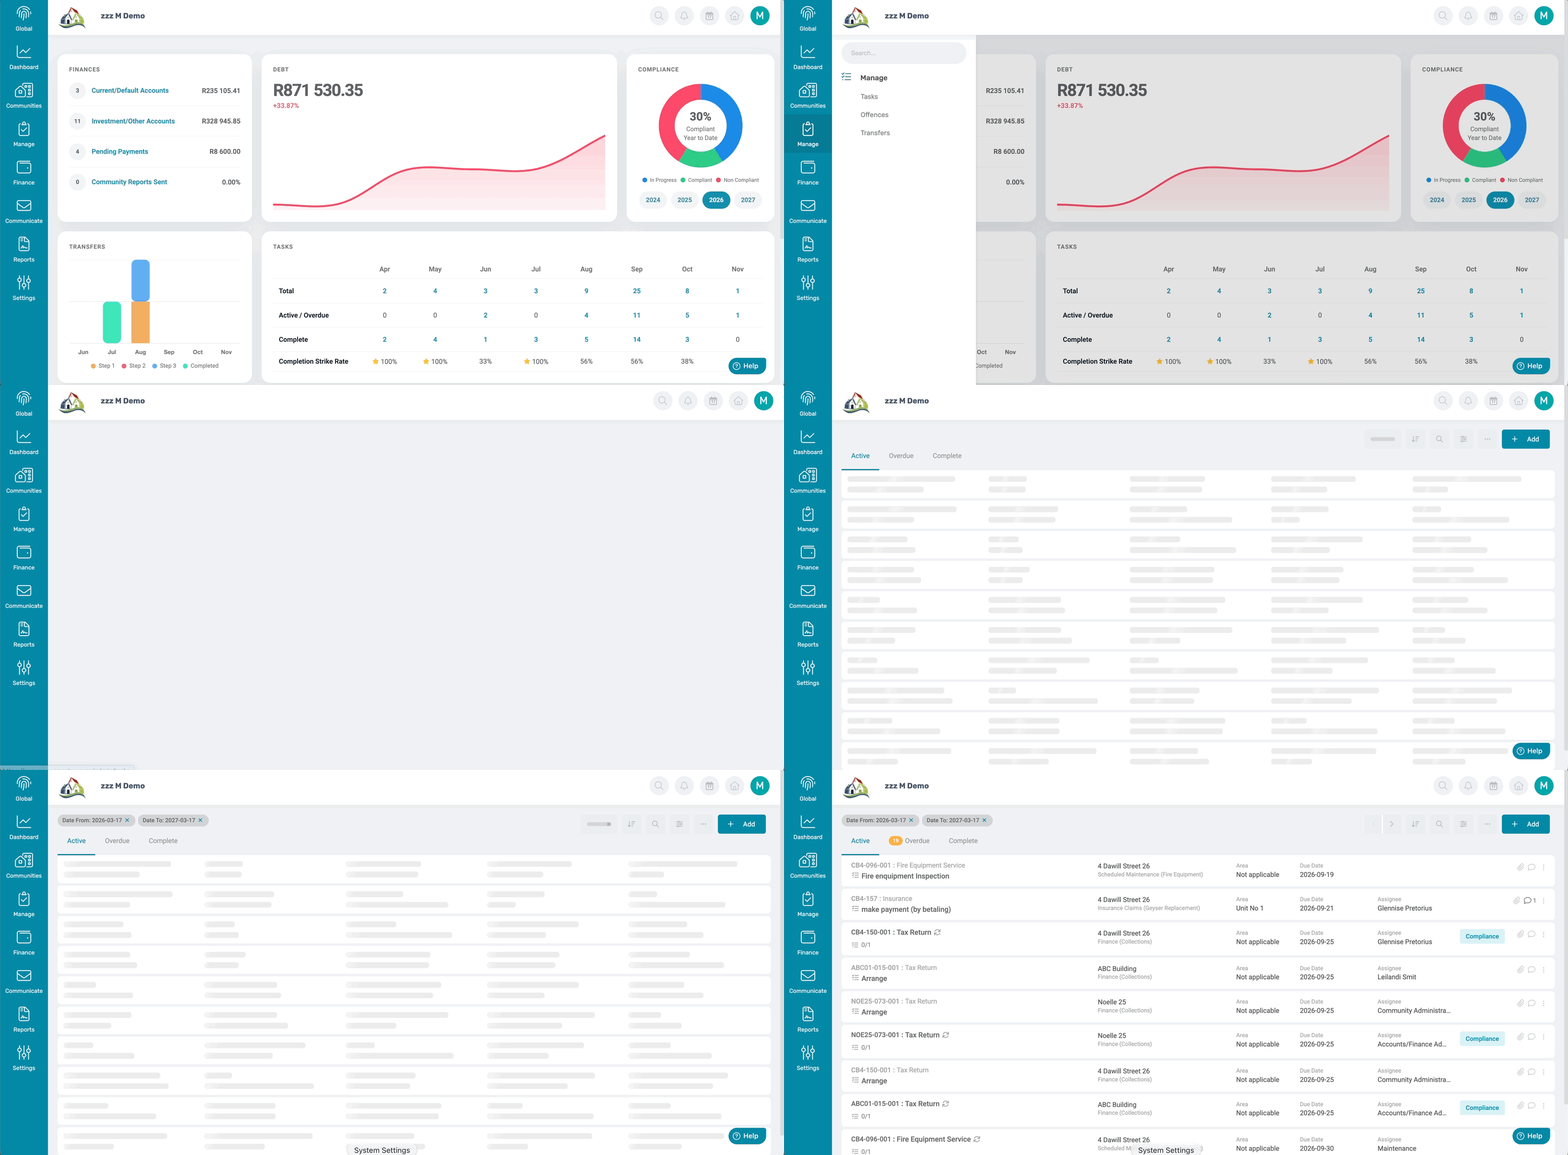
The Tasks page introduces three automatically filtered tabs, simplifying the tasks' progress and decluttering the task world.
The Tasks page will now also display Compliance and Checklist items as Tasks cards.
1.1 Active Tab
On this page, it will display all tasks, Compliance and checklist items which is active and still before the due date.
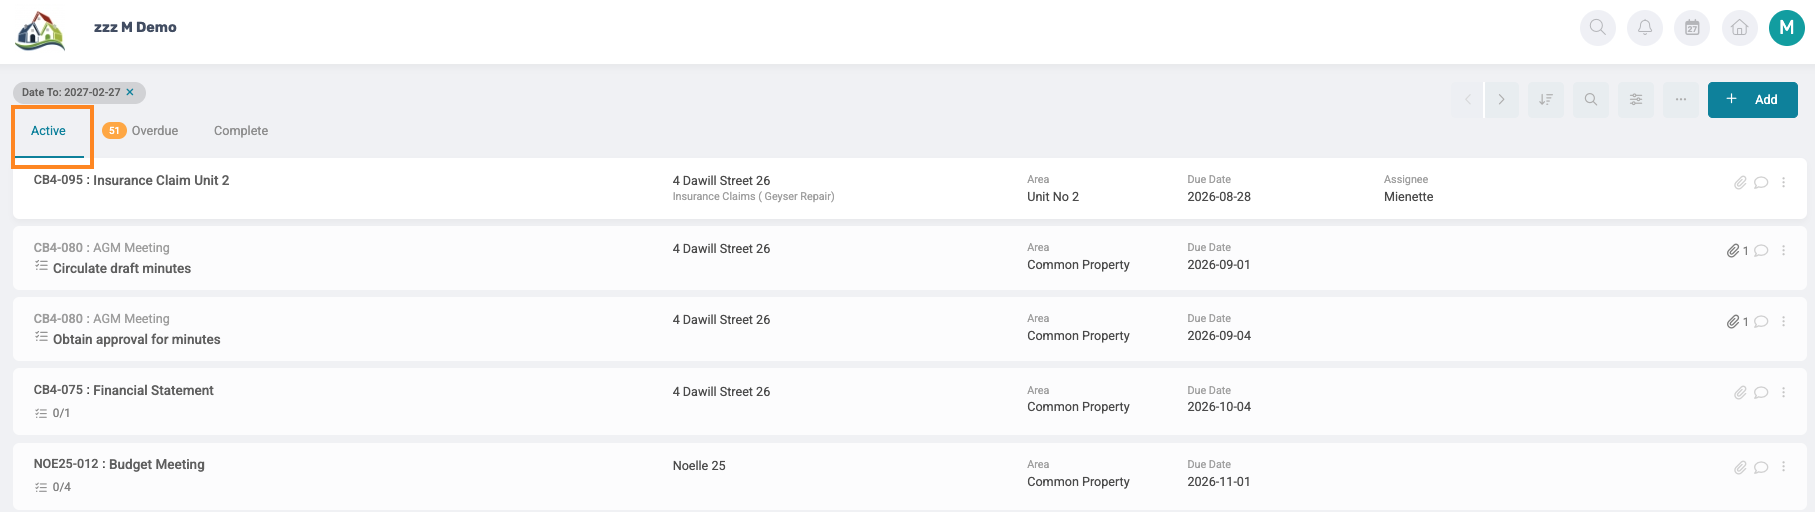
Each task clearly indicates relevant details:
- Task Reference - first three letters of community name and task ticket number (system generated)
- Title of Task
- Community Name
- Task Category and Type
- Area - in the community where this task is applicable
- Due Date
- Assignee - the person responsible for the task
- Paperclip - Shows the amount of attachments
- Speech bubble - if there is any feedback on this task.

1.2 Overdue Tab
On this page, it will display all tasks which have not been marked as completed before or on the due date selected when the task, or compliance was added.
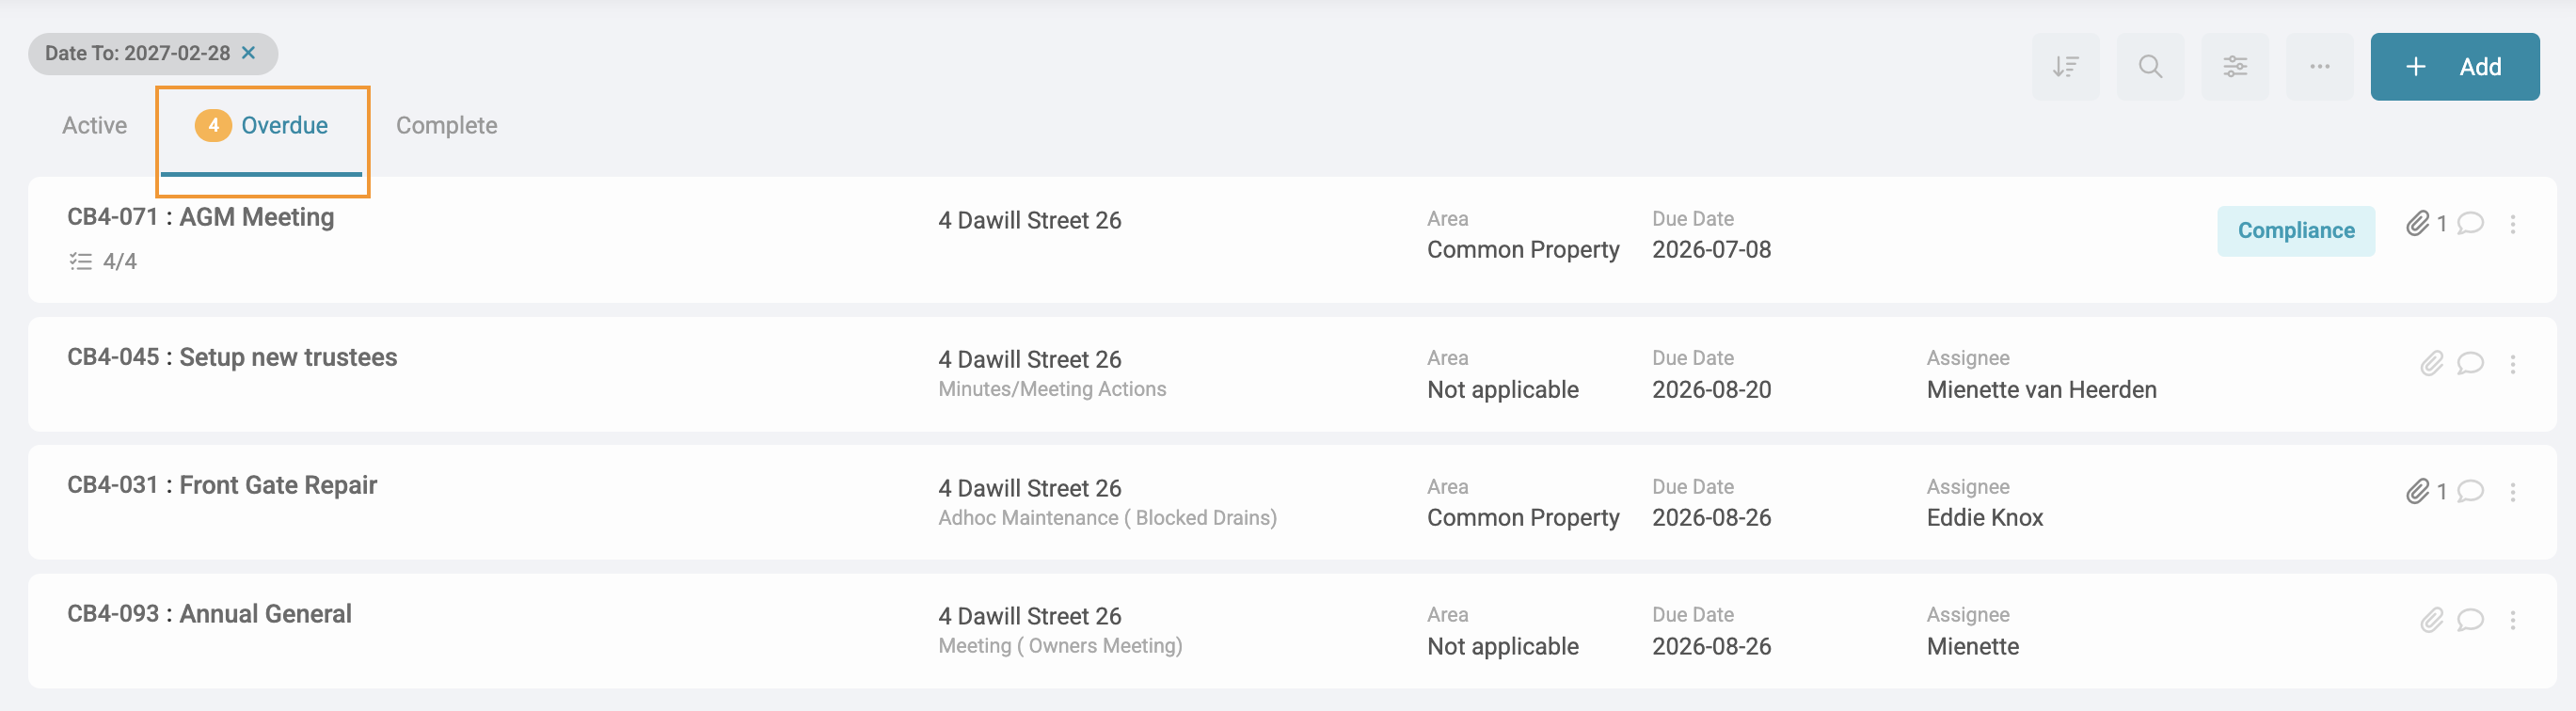
Once a task reaches its due date without being completed, the task status will automatically change to Overdue.
Before taking action, consider the following sense-check questions:
- Is a compliance document required?
Confirm whether any supporting compliance documentation is still outstanding. - Does the due date need to be amended?
If the task is still valid but requires additional time, consider whether the due date should be updated. - Is payment still outstanding?
Check whether the task is dependent on payment that has not yet been made.
1.3 Completed Tab
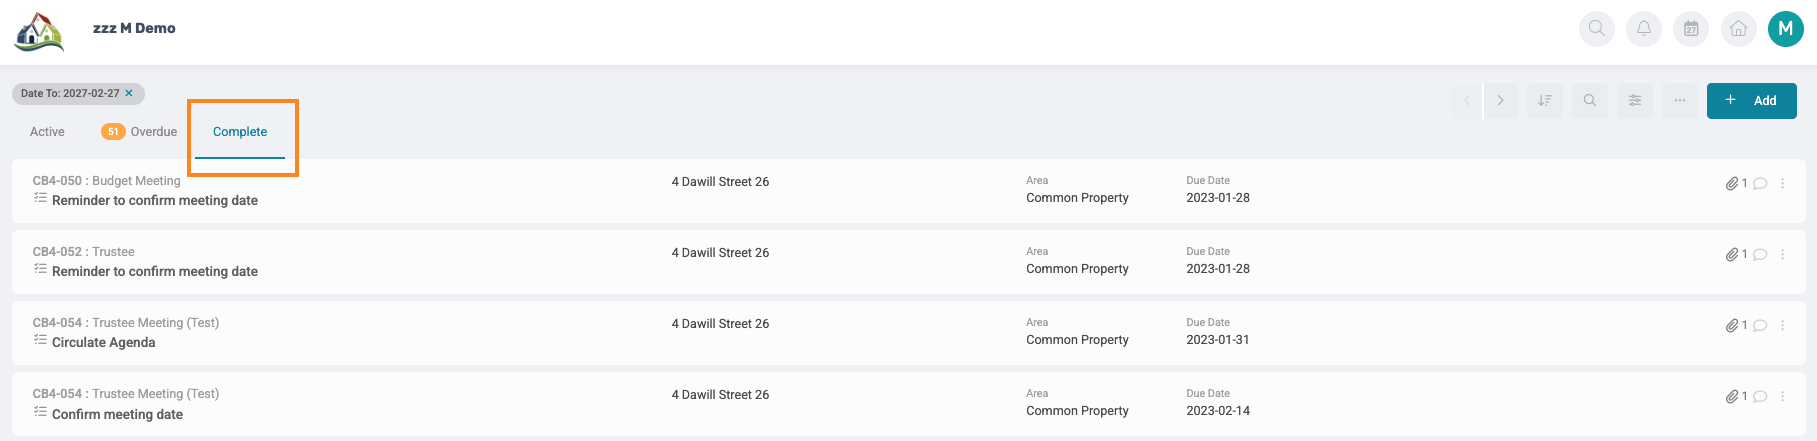
Displays all tasks marked as completed. The tasks will automatically move to the completed tab once marked as complete.
2. Filtering, Searching & Sorting Tasks
Navigation: Global Overview > Manage > Tasks (New)
2.1 Sort Option
Sort Tasks by Due Date, Task Reference, Created Date or Completed Date by clicking on the sort Icon next to the text box.

2.2 Search Option
Search tasks by Task Title, Task Reference, and/or keywords in a task description.

2.3 Filter Option
By clicking on the Filter icon, the filter dropdown will appear where there are multiple filter combinations that can be applied to assist the managing agent to be able to be more efficient in managing multiple tasks.
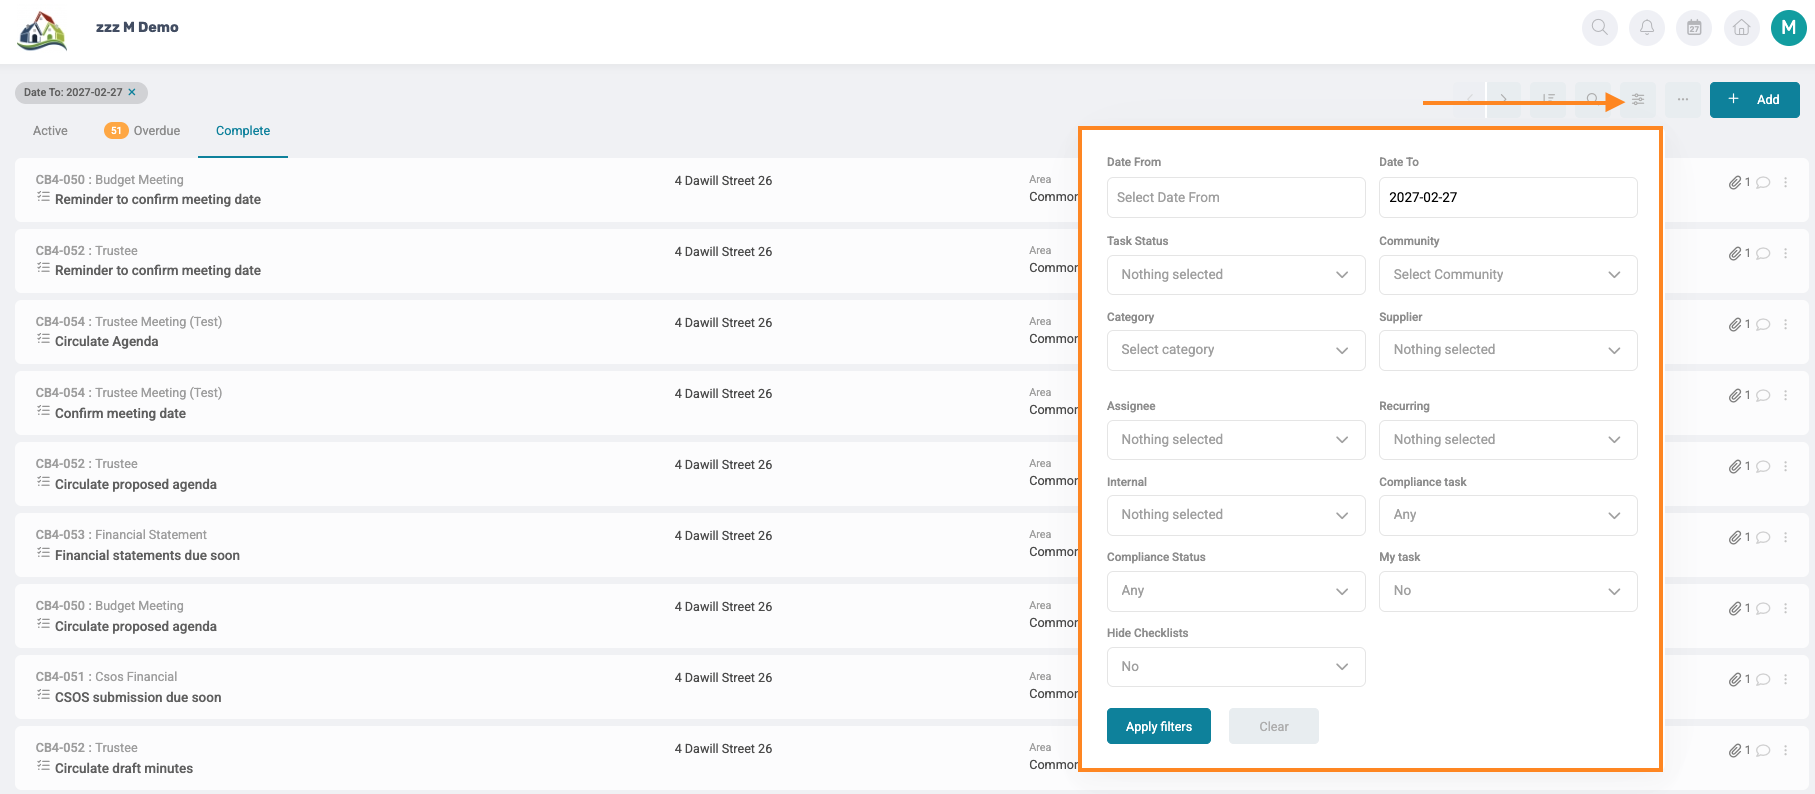
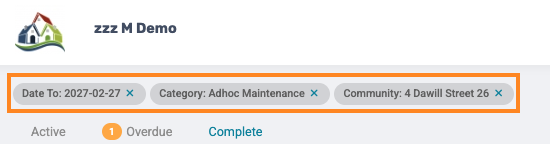
All these filters can be cleared by clicking on the cross next to the respective applied filters.
3. Adding a Task
There are three types of tasks that can be created on the Solution. The Task type selected will depend on whether the task is a once-off, needs to recur, or should contribute towards the Compliance Score:
- Single Task - Is a once-off, ad-hoc task that is created for one Community. It does not automatically repeat after completion.
- Where to create a Single Task: Global, or Community Level > Manage > Task Page.
- Recurring Task - Is a single task that is scheduled to recur automatically according to the defined frequency. It can recur weekly, monthly, yearly, or relative to the financial year-end:
- Recurring Task for One Community: Global, or Community Level > Manage > Task Page.
- Recurring Task for Multiple Communities: Global > Settings > Task Setup Page.
- Compliance Task - Is a task that is specifically intended to contribute towards the Community’s Compliance Score.
- Where to create a Compliance Task: Global > Settings > Task Setup page.
3.1. Single Tasks
Navigation: Global/ Community Overview > Manage > Tasks > + Add
3.1.1. Creating Tasks
In the top right corner, select Add to create a new task.
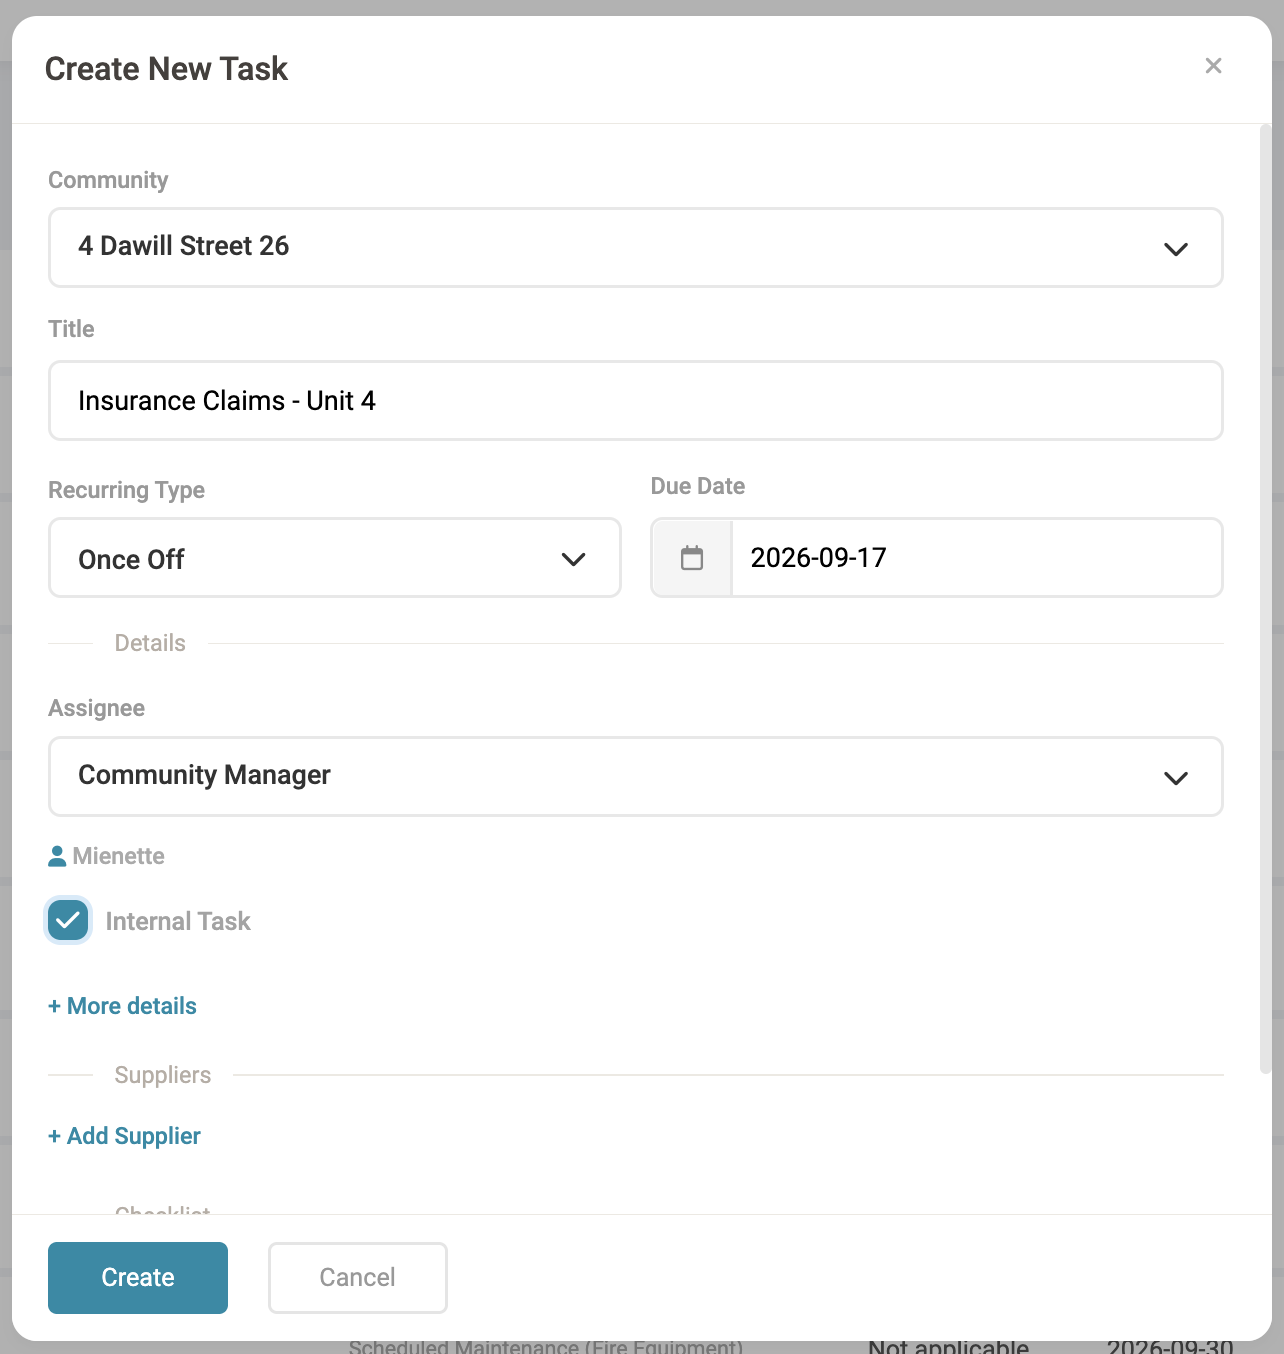
A pop-up window will appear. Complete the following fields:
- Community: Select the Community the Task applies to.
- Task Title: What is the Task about.
- Recurring type: Select Once Off for a Task that only needs to be completed once.
- Due date: Select the date by which the Task must be completed. This date will determine when the Task becomes due.
- Assignee: Select the person responsible for completing the Task. Business Users, Trustees, and Community Roles can be selected. When a Community Role is selected, the Task will be assigned to the user who is set up with that role in the Community.
- Internal : Select this tickbox if the Task should only be visible to Business Users. Internal Tasks cannot be viewed by Trustees.
3.1.2. Adding Details
To add additional details to the Task, click More Details.
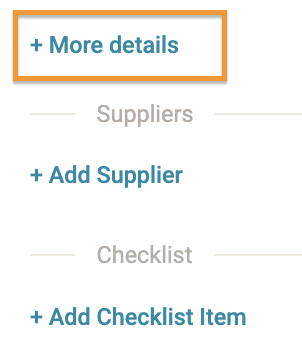
Complete the remaining Task details:
- Task Category & Type: Select the applicable Category and Type to define the nature of the Task.
Note: Always add details to a Task, especially a Category, as Categories are essential for filtering and reporting. Subcategories can be configured under Global > Settings > Task Setup > Category Setup. For further guidance, refer to the Task & Compliance Migration article below. If the required Category or Subcategory is not available in the drop-down list, select Other and enter the applicable Category or Subcategory. Tasks assigned to Other can be located by filtering on Other. |
- Area: Select whether the Task relates to Common Property, a Unit, or Both. If Unit is selected, choose the applicable Unit.
- Contacts: Select the Contacts who should be notified when action is taken on the Task. Contacts can include Owner, Trustees, Tenants, or Suppliers.
Note: External Contacts that are not linked to the Community can also be added. 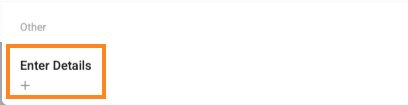 Multiple Contacts can be selected. |
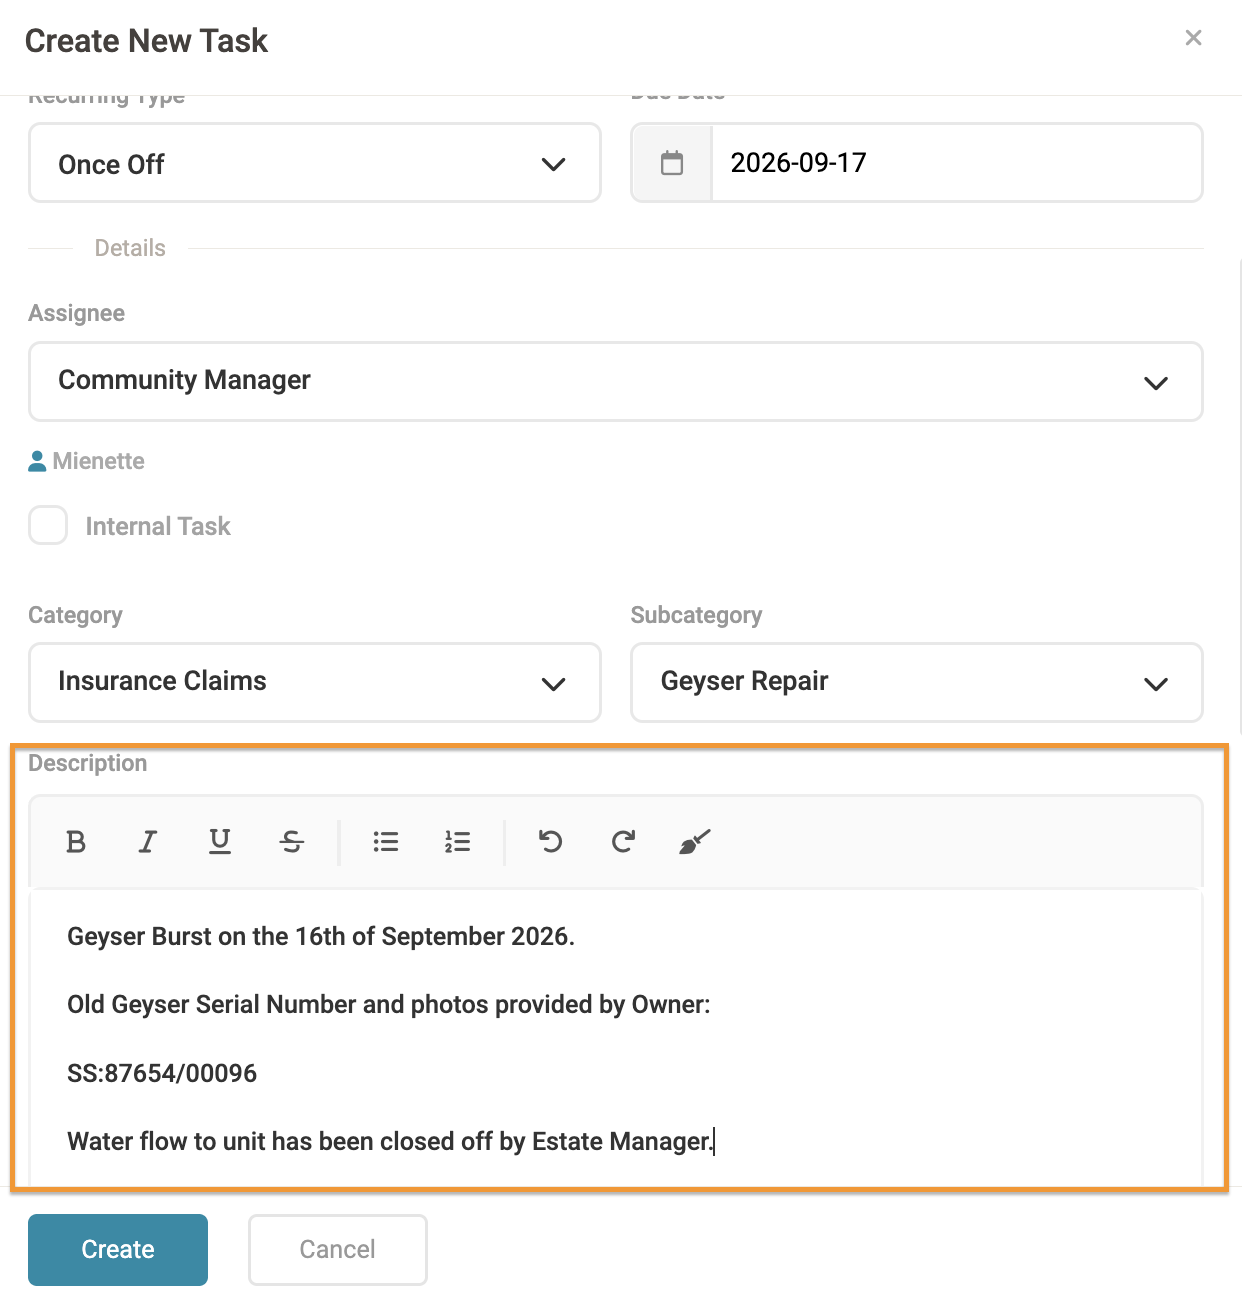
- Task Description: This section provides additional details when users view the Task. Clearly outline the action taken and any next steps required.
3.1.3. Adding Supplier
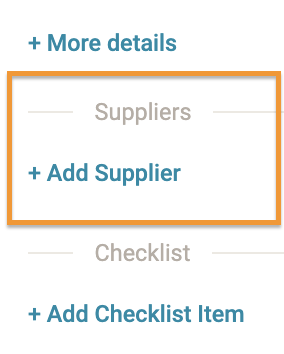
Supplier: Start typing the Supplier name or code, and select the applicable Supplier. Multiple Suppliers can be selected.
Supplier Message: Enter a clear and detailed message for the Supplier.
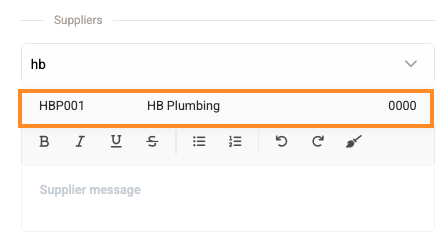
Note: The Supplier must have an email address captured under the Supplier Management function for the email notification to be sent. Once the Task is created, each selected Supplier will receive a separate email. |
3.1.4. Adding Checklist
Checklist Items are individual actions or steps that need to be completed as part of the overall task. Multiple Checklist Items can be added to a task, with each item assigned to a specific team member and given its own Due Date.
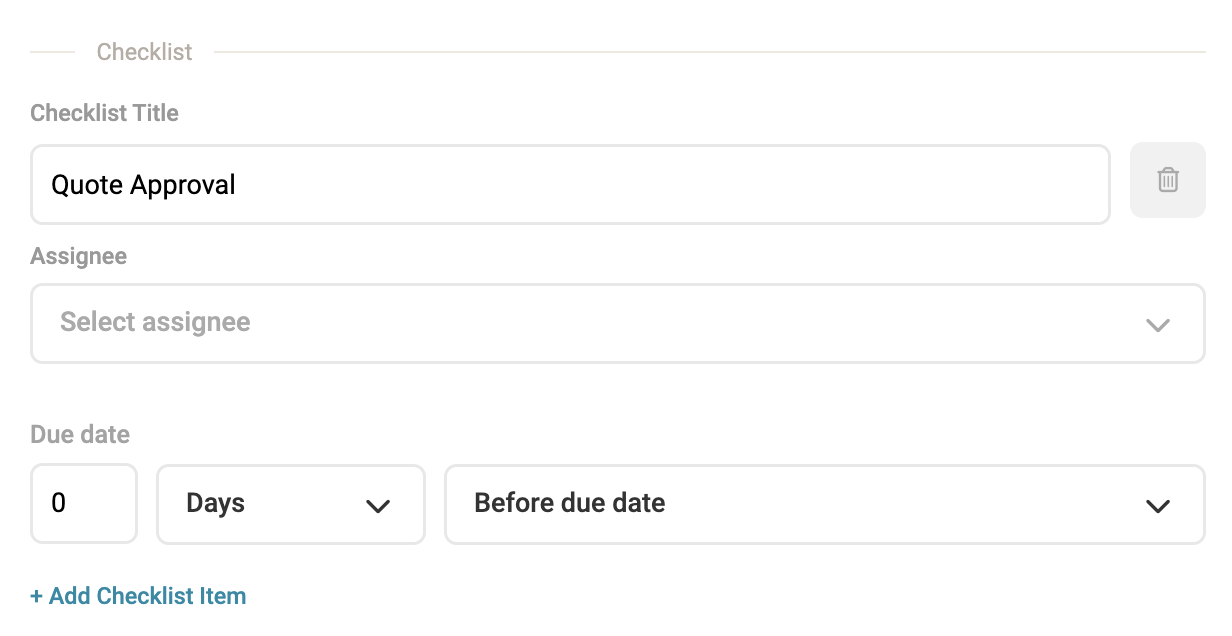
Once created, each Checklist Item will appear on the Manage > Tasks page as an individual Task Card and will be displayed according to its assigned Due Date.

Note: If all Checklist Items need to be completed by the same person, leave the Assignee field blank. The Checklist Item will automatically inherit the Assignee assigned to the main task. |
Important: To create a Recurring Compliance Task, the task must be configured through Task Setup. Access to this functionality is permission-based and may only be available to users with the required permissions. |
3.1.5. Adding Documents
Add one or multiple documents to the task as supporting attachments.
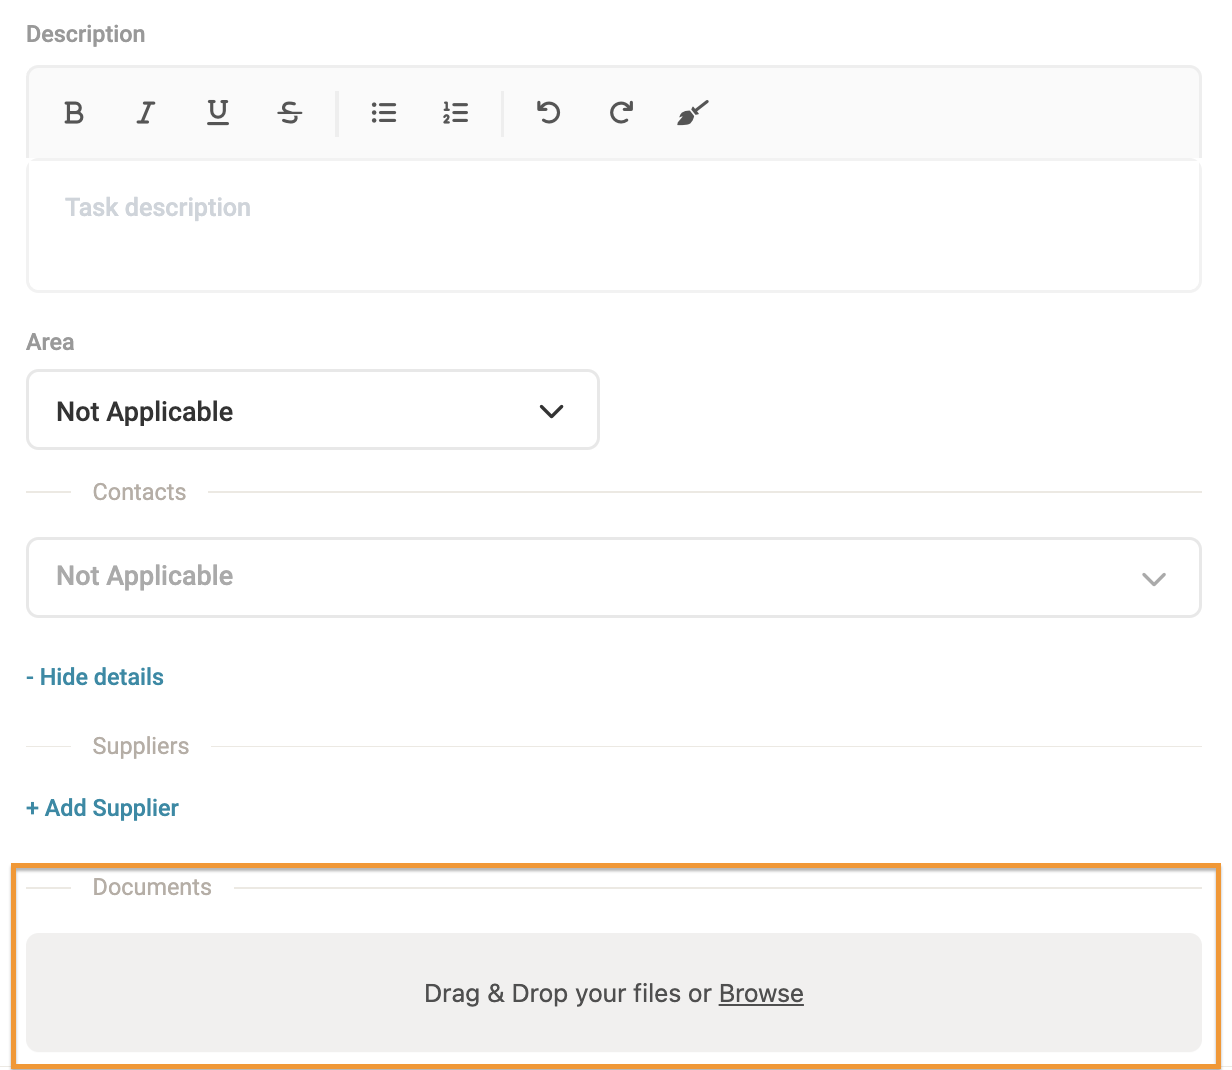
Note: The Solution currently supports the following file formats for task attachments: PDF, Word, Excel, JPEG, and PNG. |
Once all the required task details have been completed, select Create in the bottom-left corner.
The task will be created, and the assigned user will receive an email notification. The main task and all associated Checklist Items will then be displayed under the Active Tasks tab.
3.2. Recurring Tasks
Navigation: Global/ Community Overview > Manage > Tasks > + Add
In the top right corner, select Add to create a new task.
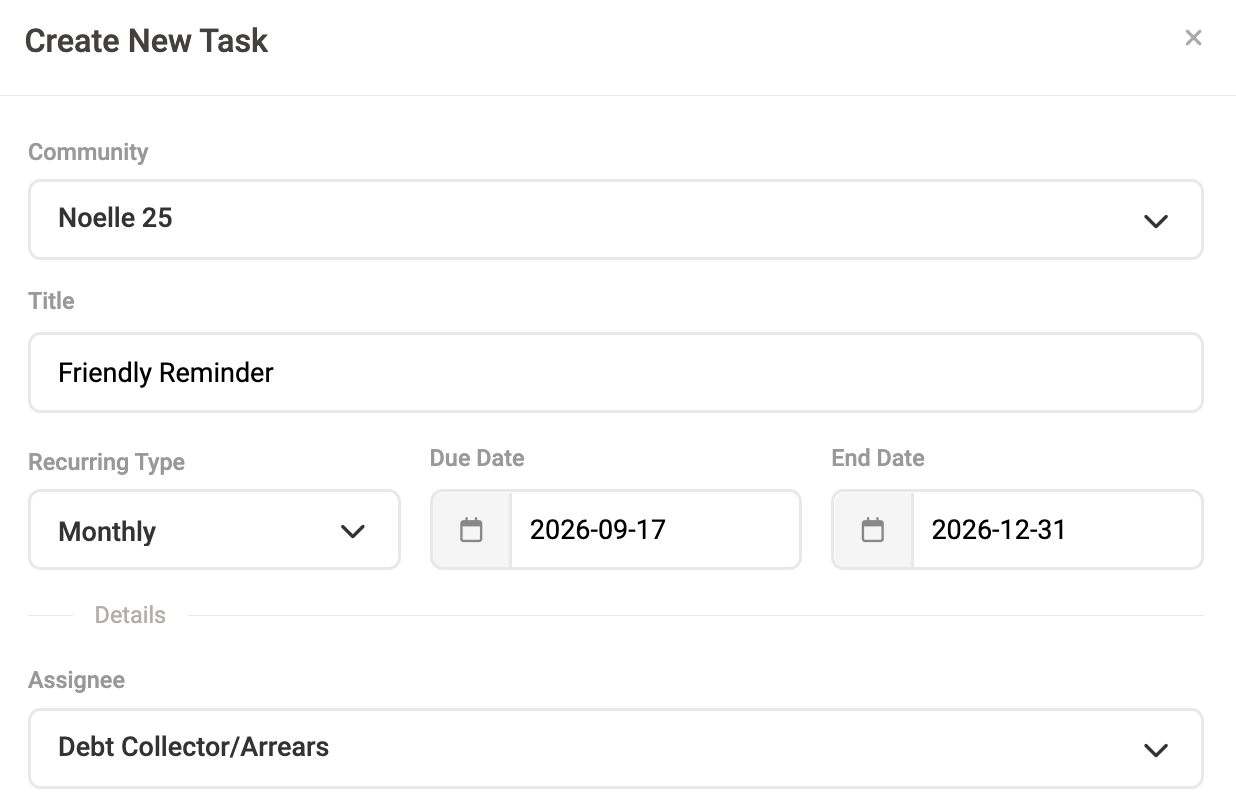
A pop-up window will appear. Complete the following fields:
- Community: Select the Community the Task applies to.
- Task Title: What is the Task about.
- Recurring type: Select the frequency that this task must recur. Weekly, monthly, yearly.
- Due date: Select the date by which the Task must be completed. This date will determine when the Task becomes due.
- End date: Select the date on which the recurring task should stop generating.
- Assignee: Select the person responsible for completing the Task. Business Users, Trustees, and Community Roles can be selected. When a Community Role is selected, the Task will be assigned to the user who is set up with that role in the Community.
- Internal : Select this tickbox if the Task should only be visible to Business Users. Internal Tasks cannot be viewed by Trustees.
The same steps used to add the details for a Single Task can be followed when completing the
remaining Task details.
3.3. Compliance Tasks
Navigation: Global Overview > Settings > Task Setup > Add
Complete the following fields:
- Task Title: Enter a clear and descriptive title for the Task.
- Task Category & type: Select the appropriate Category & Type to define the nature and purpose of the Task.
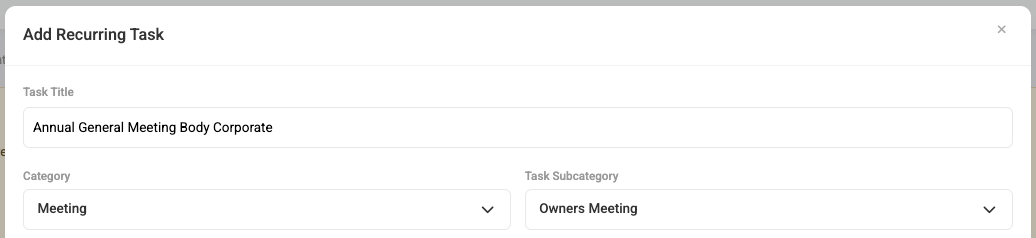
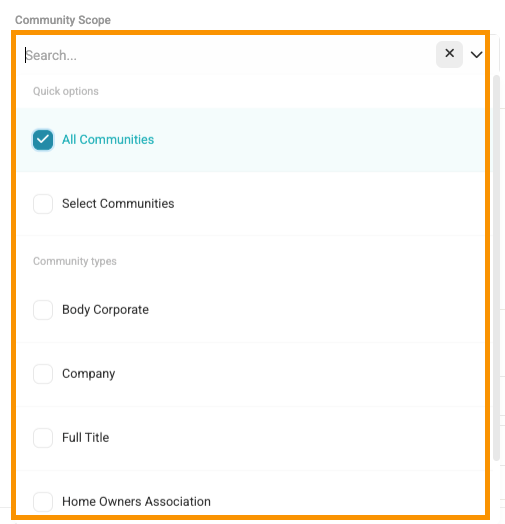
- Community Scope: Select the Communities to which the Compliance item applies. (All/ Specific/ Body Corporate. Homeowners Association).
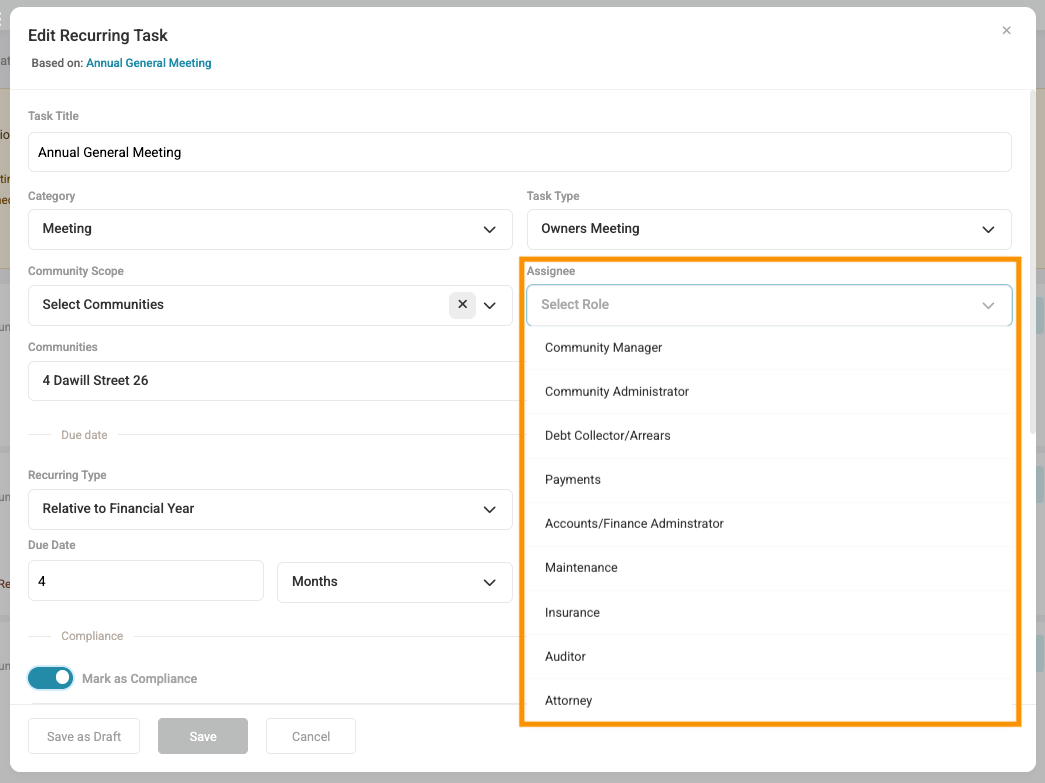
- Assignee: Select the person responsible for completing the Compliance task. Only Community Roles can be selected. Ensure that the Community Roles have been setup.
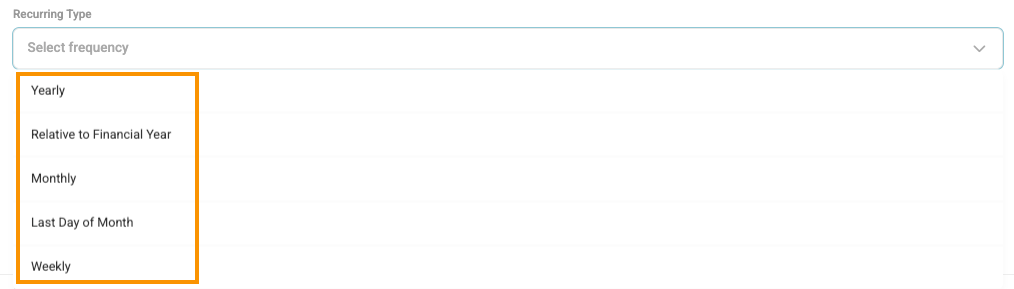
- Recurring Type: Select the frequency at which the Task should recur: Yearly/ Monthly/ Weekly/ Etc.
- Due Date: When setting up a Recurring Task, specify the Due Date. The End Date is optional.
- Due Date: The date by which the task must be completed.
- End Date: The date on which the recurring task should stop generating new tasks.
Ensure that both dates are correctly configured to ensure the recurring task runs for the required period.
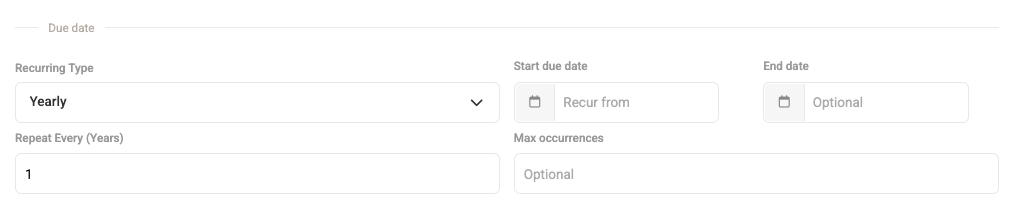
- Repeat Every (Years): Enter how often the item should recur, based on the number of years. For example, Valuations needs to occur every three years.

- Compliance Item: Determine whether the item should contribute to the Compliance Score. Select Mark as Compliance checkbox if the item is a legally required action that must be completed.
- Compliance Criteria: Select whether the requirement is to Upload a Document, and/ or Marking the task as complete. Where document upload is required, select the Document folder it should post to.

- Checklist items: Ensure that all required checklist items are included. An assignee can be selected for each checklist item.
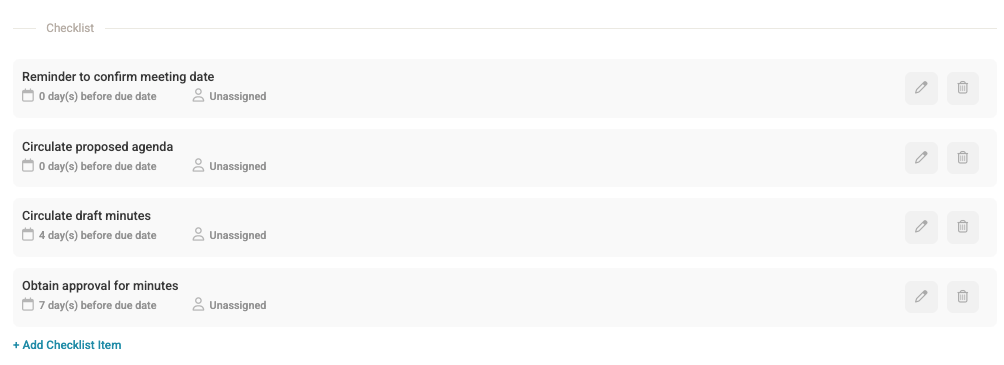
To create the task, select Create in the bottom-left corner. The task will be created, and the assignee will be notified via email.
Once created, all checklist items will be available under the Active Tasks tab for completion.
Alternatively, the task can be saved as a Draft by selecting Save as Draft in the bottom-left corner.
A task saved as a draft will not be visible or reflected in the Community until it has been created.

Important: Compliance items can only be created on Global > Settings > Task Setup, and is only permission based. |
4. Managing of Tasks
4.1. Task Status Change
As default any task which has been created the status will be In Progress. This is indicated in the top left corner of the Task Card pop-up.
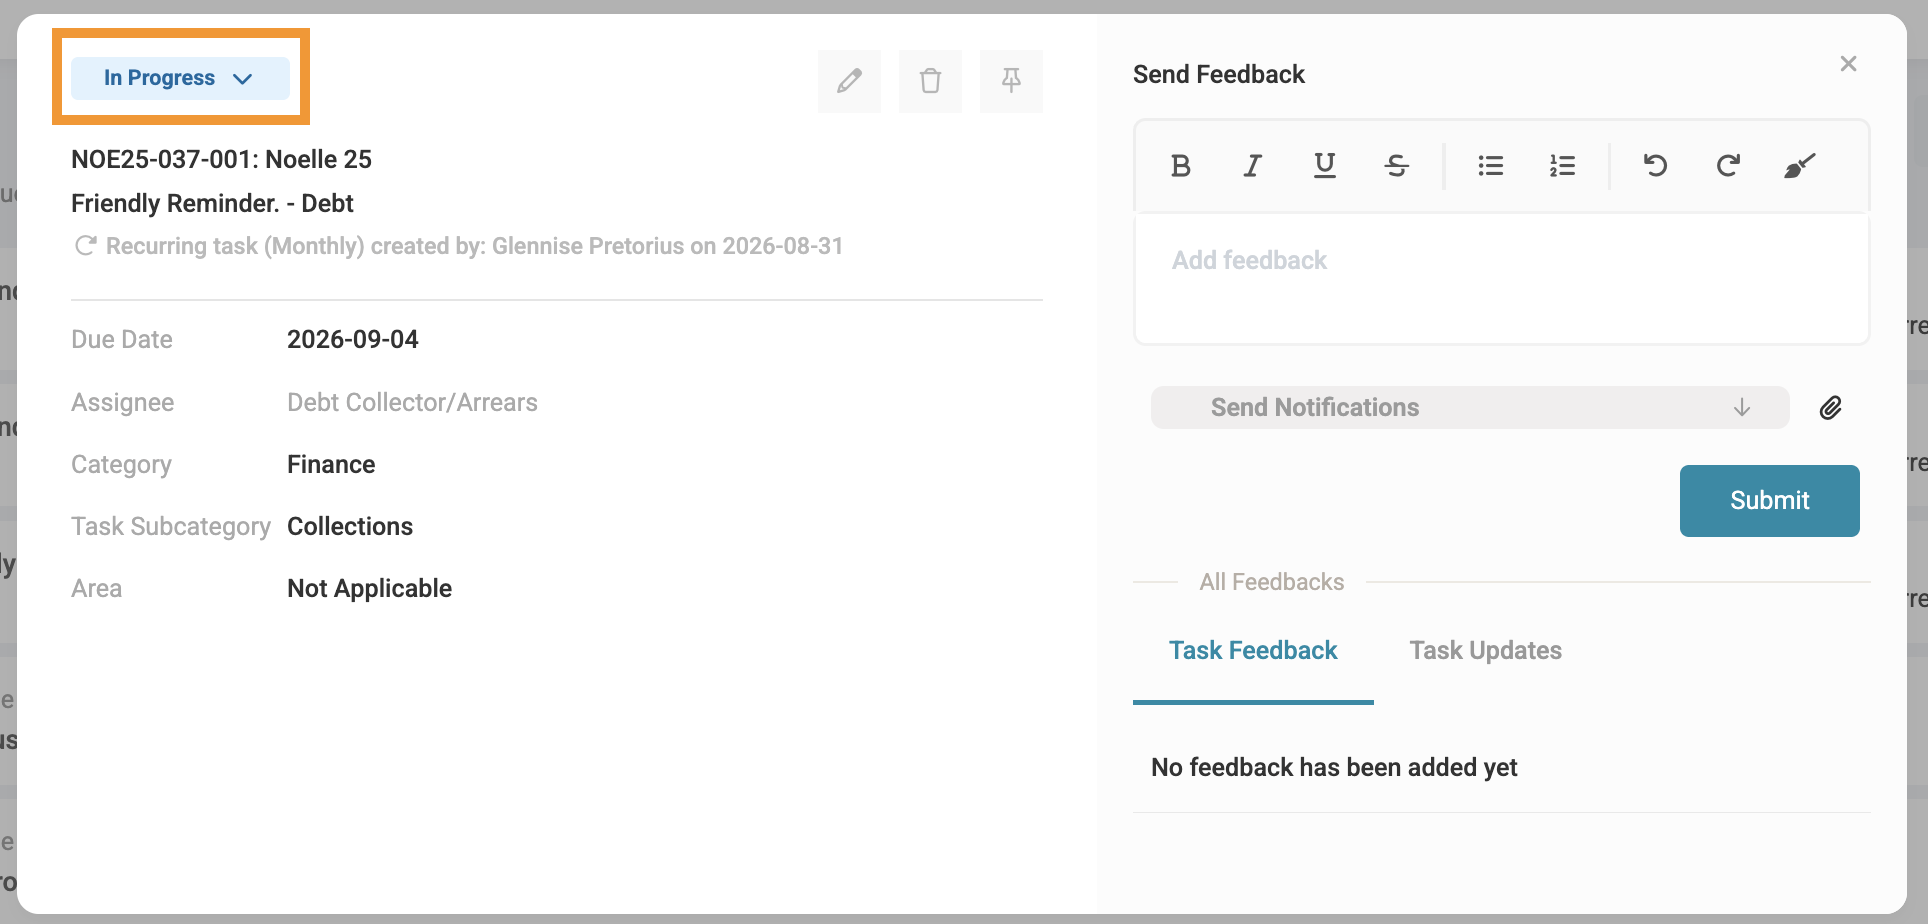
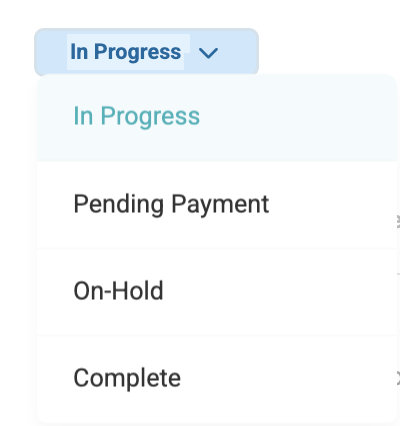
There are four statuses that can be applied across all three filter tabs by simply clicking on the dropdown arrow to the right of the status.
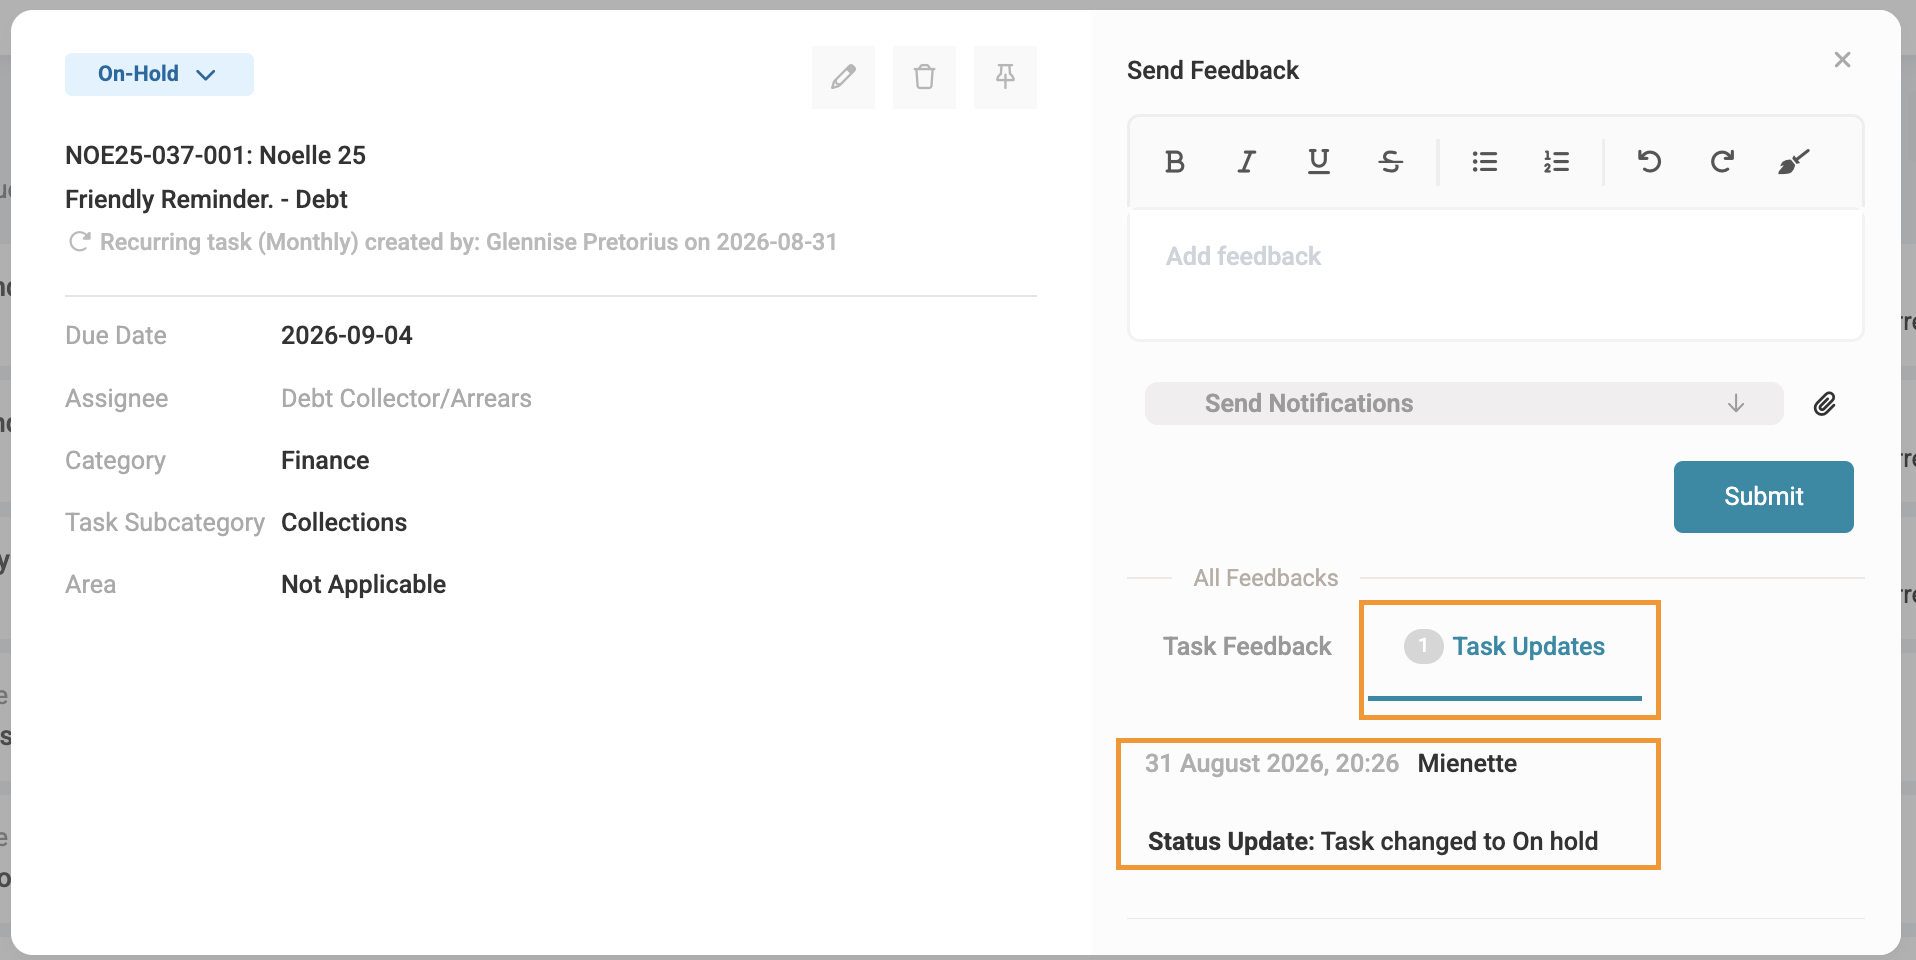
Any changes made to a Task card will be noted at the bottom of the task card.
4.2. Task Feedback
Feedback on Tasks is really important to keep all parties involved and in the loop regarding tasks. This is done by adding feedback in the task updates text box. Attachments can be added by clicking on the paperclip icon.
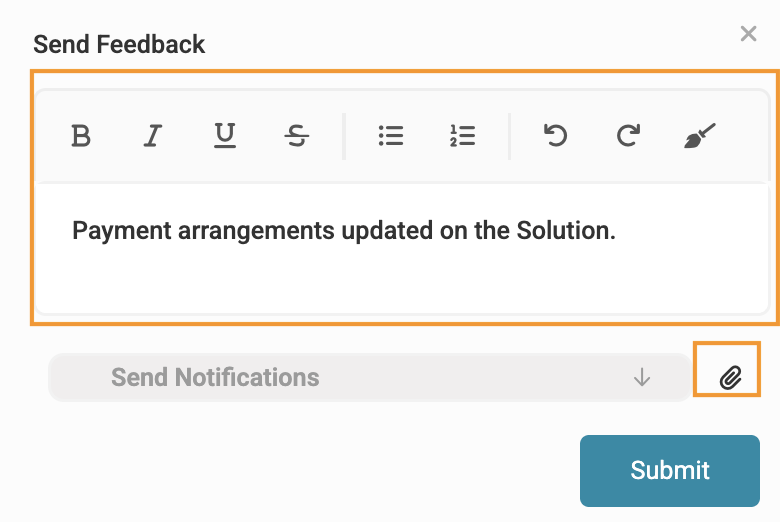
Important: Feedback attachments cannot be deleted, only initial attachments when the task was created. |
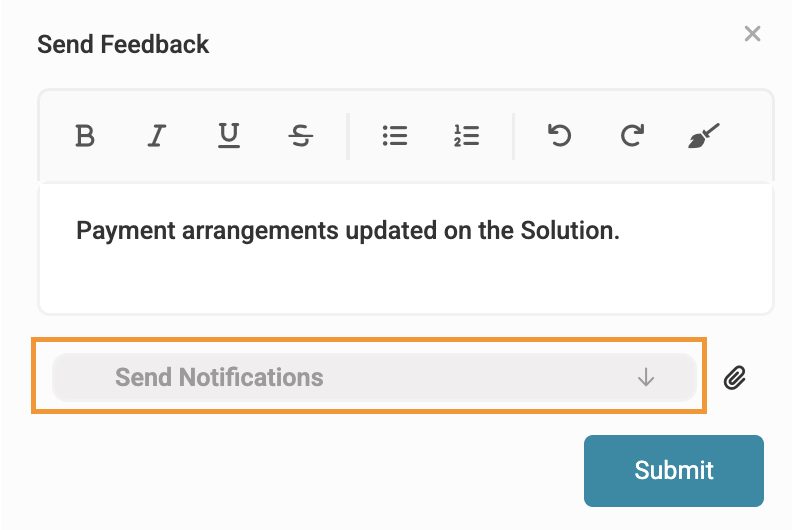
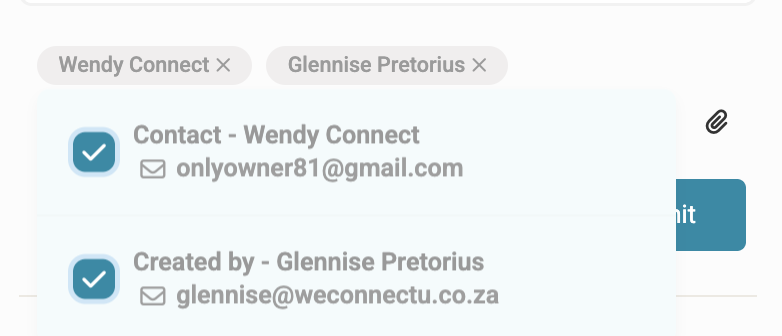
When ready click on the dropdown arrow next to the Send Notification option, and a dropdown will appear that lists all related parties to the Task: including the Assignee, Contact, and person who created the task.
By clicking on the relevant parties there will be a tick next to each user's name this will indicate that this user will receive this notification once the submit button is clicked.
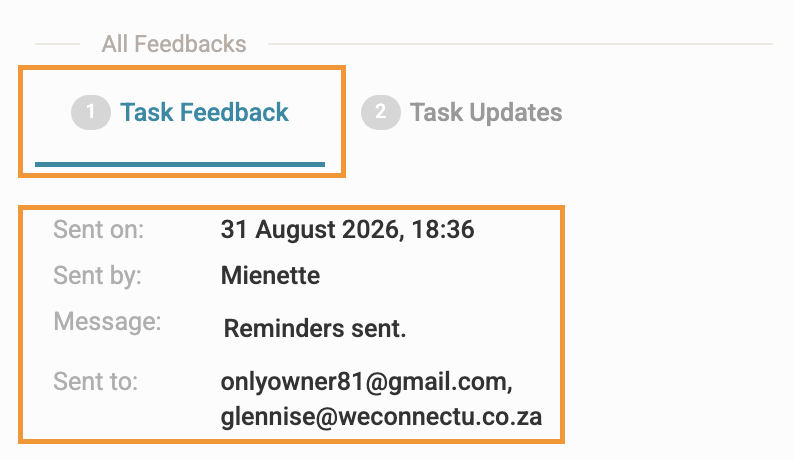
Once feedback is submitted this action will be added to the feedback tab of the task card.
4.3. Editing Tasks
4.3.1. Single & Recurring Task
Navigating: Global/ Community Overview > Manage > Tasks
Select the Pencil icon at the top-centre of the screen to make amendments to the task, such as changing the Assignee or Due Date.
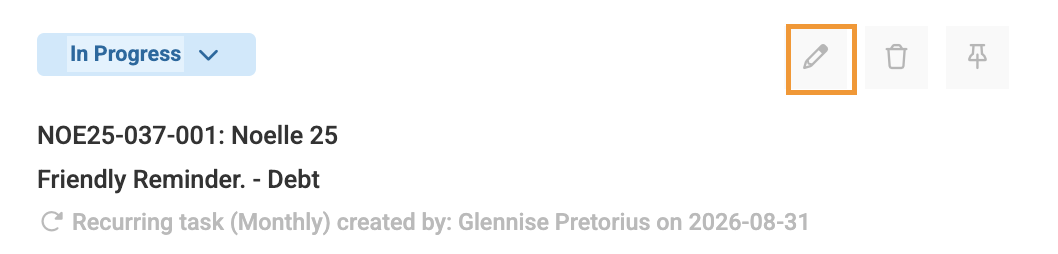
All changes made to the task will be recorded under Task Updates, located on the right-hand side of the screen. This section is separate from Task Feedback and provides an audit trail of all task changes, including the date of the update and the name of the person who made the change.
4.3.2. Compliance Task
Navigation: Global Overview > Settings > Task Setup
Select the Recurring Item under Settings > Task Setup. The Task Card will open, allowing the required information to be reviewed and updated.
Note: The Recurring Type of an existing setup should not be changed, as this may affect the accuracy of the data and disrupt the existing recurring series. If the recurring frequency needs to be changed, the existing setup should be ended, and a new setup should be created with the required Recurring Type. This ensures that the recurring series and associated data remain accurate. To end a recurring task, update the Due Date to a date in the past. This will stop the recurring task from generating further instances.
|

4.4. Deleting Tasks
4.4.1. Sing & Recurring Task
Navigation: Global/ Community Overview > Manage > Tasks
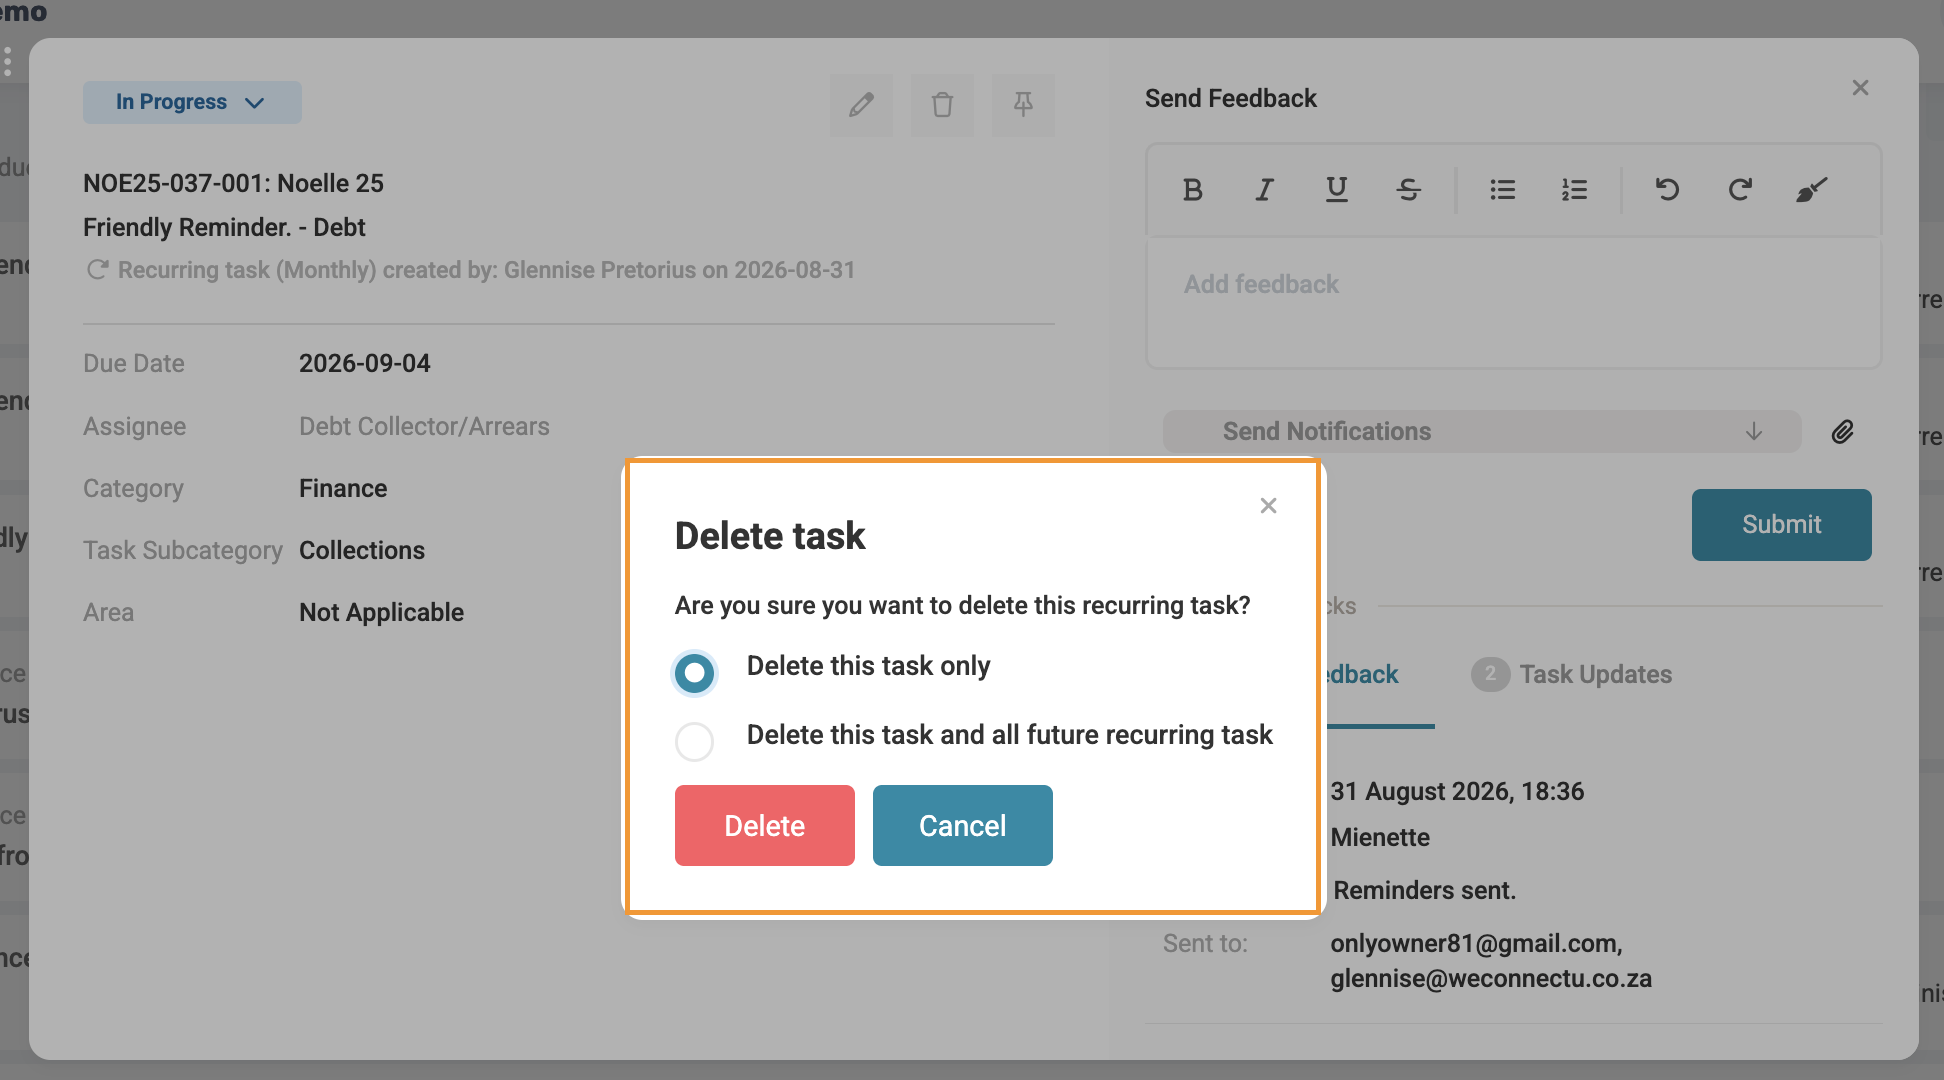
Select the Rubbish Bin icon to delete the task. Once deleted, the task and its history will be permanently removed and no record of the task will be retained against the Community.

When deleting a task that forms part of a recurring series, the Solution will prompt the user to confirm whether only the selected occurrence should be deleted or all tasks in the recurring series should be deleted.
4.4.2. Compliance Task
Navigation: Global Overview > Settings > Task Setup
Compliance Tasks can only be deleted at a Global Level.
Important: A Compliance Item should only be deleted if no processing has been completed on any existing Compliance Tasks. Deletion is therefore recommended only for newly created Compliance Items that have not yet been processed. |
Next to the Compliance Item select the three-dot menu on the right-hand side of the relevant Recurring Task, and click on Delete.

4.5. Pin a Tasks
Navigation: Community Overview > Manage > Task
Select the Pin icon to pin the task to the Community's Planner Dashboard.

The pin can be removed by clicking the same icon.
Why Pin a Task?
Pinning a task allows it to:
- Be included on the Community Report's Planner section.
- Remain easily accessible on the Community Planner Dashboard.
5. My Action List
Navigation: Global/ Community Overview > top-right corner > Calendar Icon
The My Action List page provides an overview of all tasks assigned to the logged-in user.
It displays:
- Outstanding tasks for the current month.
- Completed tasks.
- The option to action and manage tasks directly from the page.
The calendar provides a visual overview of tasks based on their respective due dates. Tasks are colour-coded to make their status easy to identify:
- Blue – Planned: Tasks that are scheduled or planned.
- Red – Overdue: Tasks that have passed their due date and are still outstanding.
- Yellow – Meetings: Tasks relating to scheduled meetings.
- Green – Completed: Tasks that have been completed.
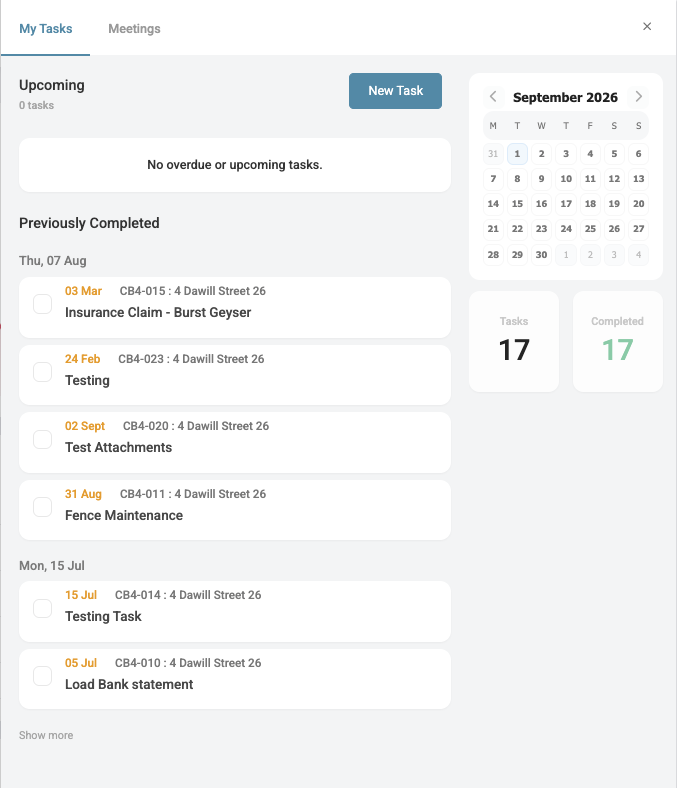
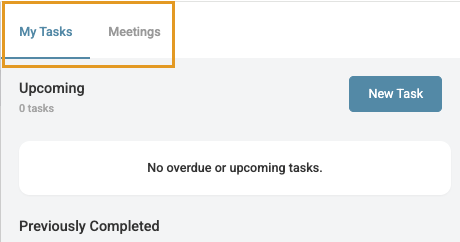
The User can filter My Action List to display either Tasks or Upcoming Meetings by selecting the relevant tab at the top of the page.
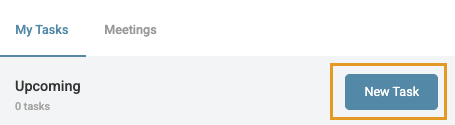
Quick Tasks can also be added directly from the My Action List page by selecting New Task.
| Resources: | ||
| CMS - Task Overview | ||
| CMS - How to Add Single Tasks | ||
| CMS - How to Add Recurring & Compliance Tasks | ||
| CMS - Managing of Tasks | ||
| CMS - Task & Compliance Setup Guide | ||
| CMS - How to Setup Community Roles |
Was this article helpful?
That’s Great!
Thank you for your feedback
Sorry! We couldn't be helpful
Thank you for your feedback
Feedback sent
We appreciate your effort and will try to fix the article