The Bulk banking function enables a single bulk banking file to be imported for multiple communities at once. The Solution automatically separates the transactions into the relevant communities based on the account numbers, saving time by removing the need to import each community's bank statement individually.
To be able to use the Bulk Banking Function, the following steps need to be done:
1. Setup
1.1. Get into contact with Standard Bank
Phumla Madlopha
Standard Bank Bulk banking
t: 083 432 3565
Standard Bank
e: riaan.strydom@standardbank.co.za
1.2. Setup all Standard Bank Online, PRE & FREE accounts
Standard Bank then guides the migration process or the setup of the necessary Standard Bank Online PRE or FREE accounts.
1.3. WeconnectU Cashbook Setup
Once the accounts have been migrated to Standard Bank Online PRE or FREE, the bank accounts/ cashbooks on the Solution needs to be setup to enable the Standard Bank Bulk Banking Integration.
Navigation: Community Level > Finance > Setup - Financial
Click on the dropdown list of Bank Integration and select the Standard Bank integration per the bank setup in use.
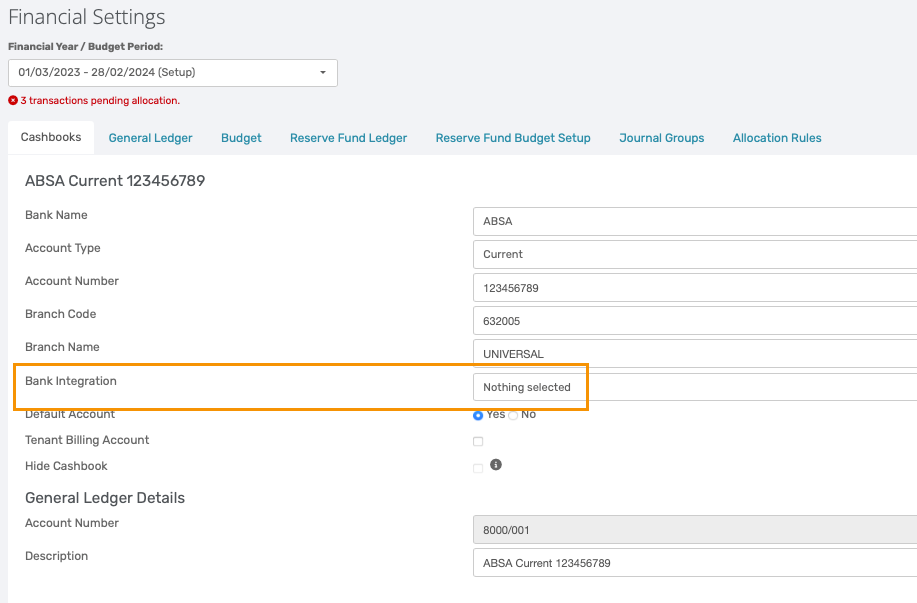
Note: This process must be completed for all Standard Bank accounts across all Communities |
2. Uploading Cashbooks
2.1. Retrieving Bulk Cashbook via Email
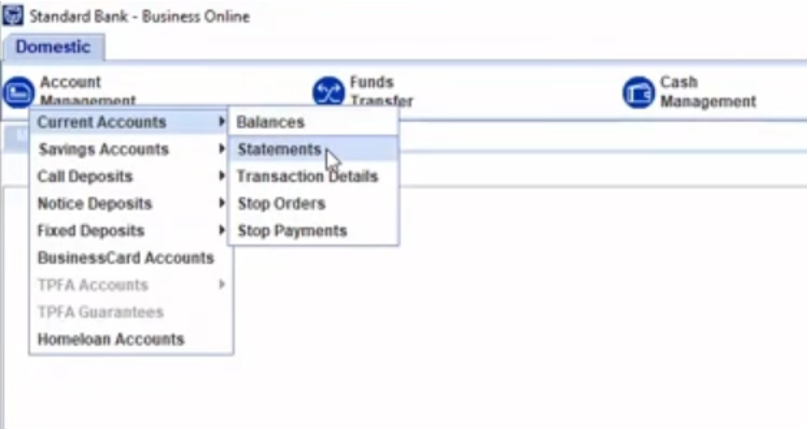
To download a bulk statement, navigate to the Standard Bank profile:
- Select Account Management
- Select Current Accounts
- Then click on Statements
Bulk Banking Statements can be downloaded at anytime from this section.
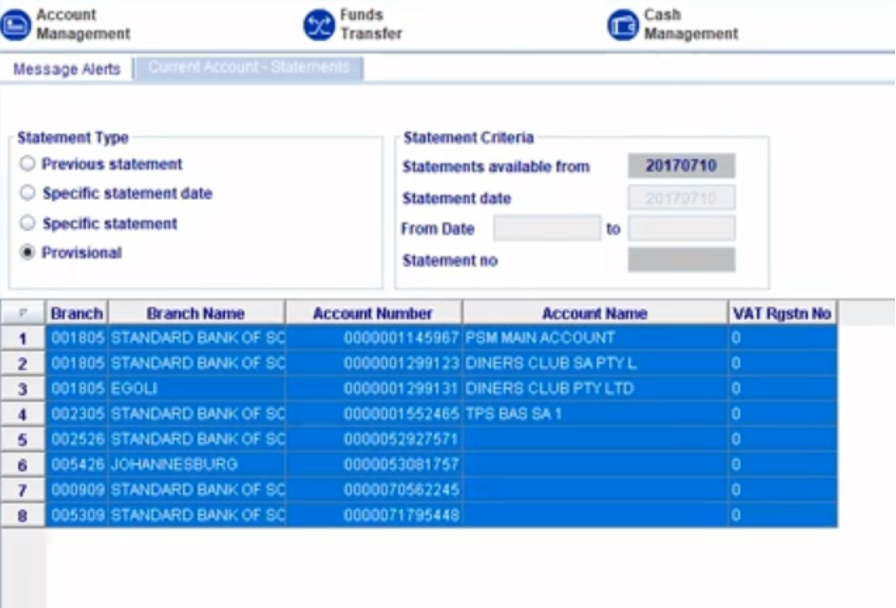
- The next page displays all relevant accounts across the selected communities. Select all the accounts and click Export to download a single bulk statement for all the selected accounts.
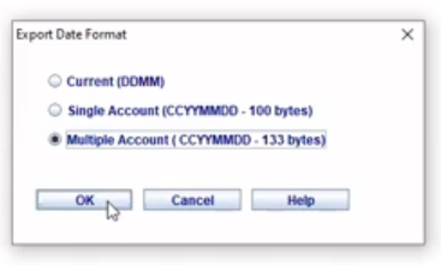
- Select Multiple Account format on the next page.
2.2. Upload Cashbook on WeconnectU
Navigation: Global Overview > Finance > Cashbook
On the Cashbook landing page, select Cashbook Option located on the far right of the screen.

- From the drop-down menu, click on Upload Cashbook, and select the Standard Bank Business Online Pre or FREE format.
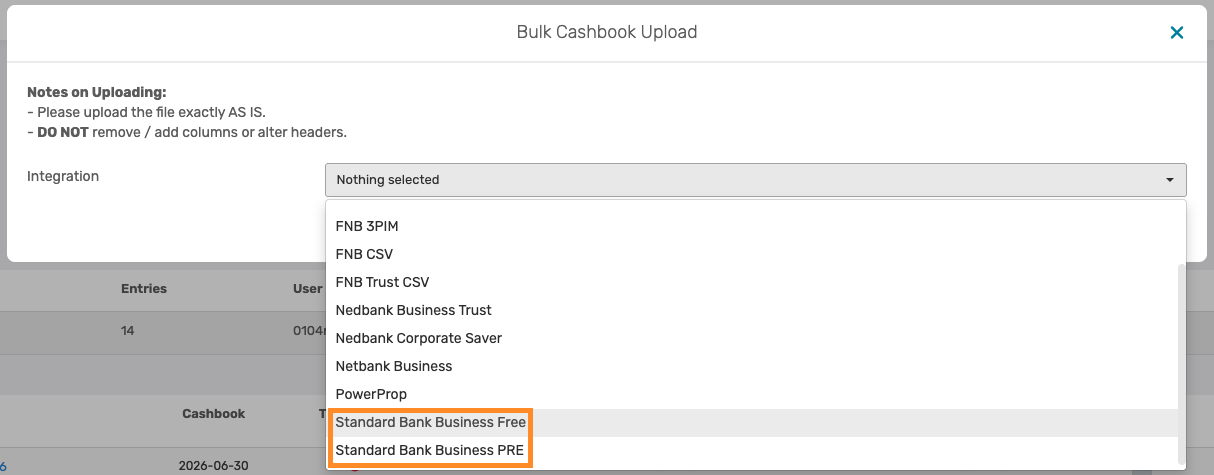
- Upload the file retrieved from Standard Bank.
- Lastly, check for duplicates, and click on Submit.
3. Export Supplier Payments
Supplier invoices must first be created within the Solution and authorised by the relevant Business User or Trustees/Directors before processing can continue. Click here to view the how to guide on Supplier Invoices.
3.1. Export Function
Navigation: Global Overview > Finance > Payments
On the Payment landing page, select Export Payments located at the top right of the page.

- A list of all authorised Payments will be displayed, from which the required Payments can be selected for export and processing.
Note: An Excel file containing all authorised and selected payments will be downloaded, which can then be uploaded to ABSA Bank for processing. |
3.2. Upload to Standard Bank
Navigation: Standard Bank Login > Funds Transfer > Payments > All Payments
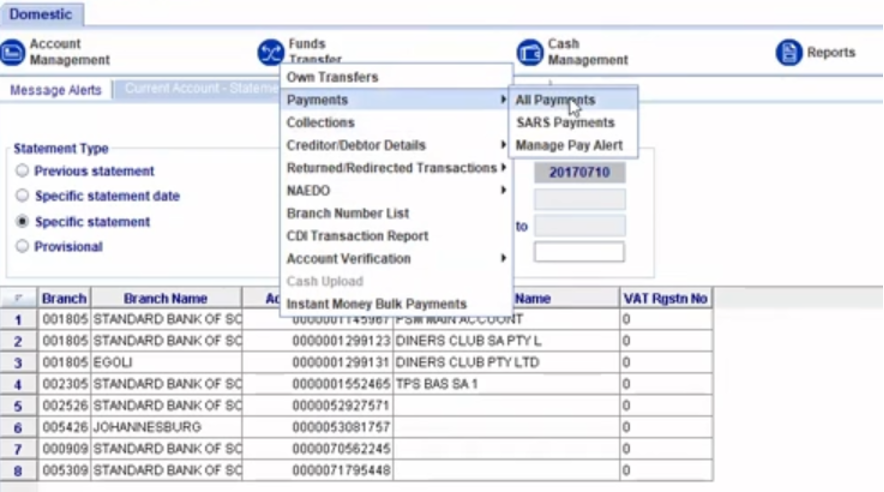
Click on Import at the bottom right, and select the Current Format.
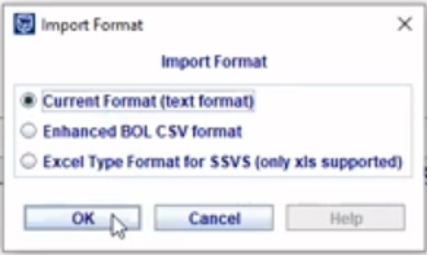
Once the file has been uploaded, the authorised signatory can review and authorise the payments.
Resources: | ||
CMS - Bulk Banking How to Guide | ||
| CMS - How to Setup Bulk Banking | ||
| CMS - How to Upload Bulk Banking | ||
| CMS - How to Bulk Export Supplier Payments |
Was this article helpful?
That’s Great!
Thank you for your feedback
Sorry! We couldn't be helpful
Thank you for your feedback
Feedback sent
We appreciate your effort and will try to fix the article