The Bulk banking function enables a single bulk banking file to be imported for multiple communities at once. The Solution automatically separates the transactions into the relevant communities based on the account numbers, saving time by removing the need to import each community's bank statement individually.
TABLE OF CONTENTS |
To be able to use the Bulk Banking Function, the following steps need to be done:
1. Setup
1.1. Get into contact with ABSA
Mandy De Kock
Specialist Transactional Banking Corporate and Investment Banking
t: 011 350 5833
ABSA eBanking Cape
1.2. Setup all ABSA Business Integrator, or ABSA TPFA accounts
ABSA then guides the migration process or the setup of the necessary ABSA BI accounts.
1.3. WeconnectU Cashbook Setup
Once the accounts have been migrated to ABSA BI or ABSA TPFA, the bank accounts/ cashbooks on the Solution needs to be setup to enable the ABSA Bulk Banking Integration.
Navigation: Community Level > Finance > Setup - Financial
Click on the dropdown list of Bank Integration and select the ABSA integration per the bank setup in use.
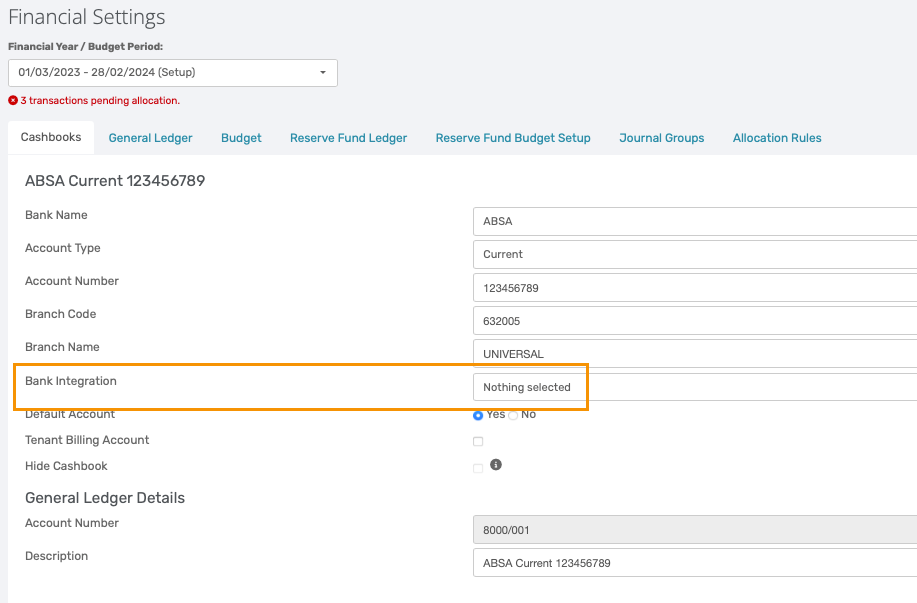
Note: This process must be completed for all ABSA accounts across all Communities |
2. Uploading Cashbooks
2.1. Retrieving Bulk Cashbook via Email
On the Statement download tab:
- Select Comma-delimited ASCII Text’ / OR ABSA TPFA
- Select the date range applicable
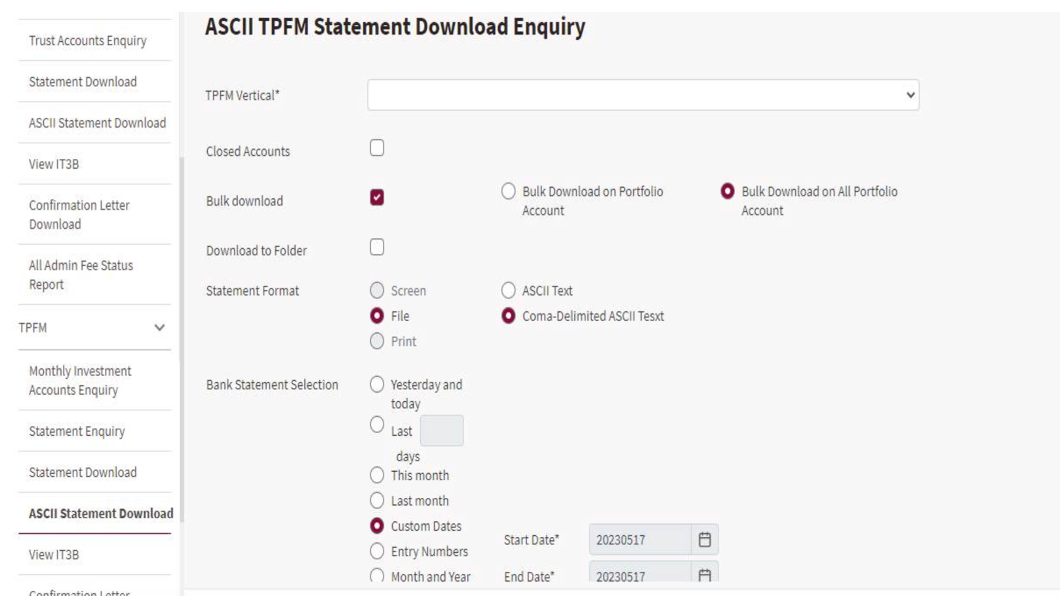
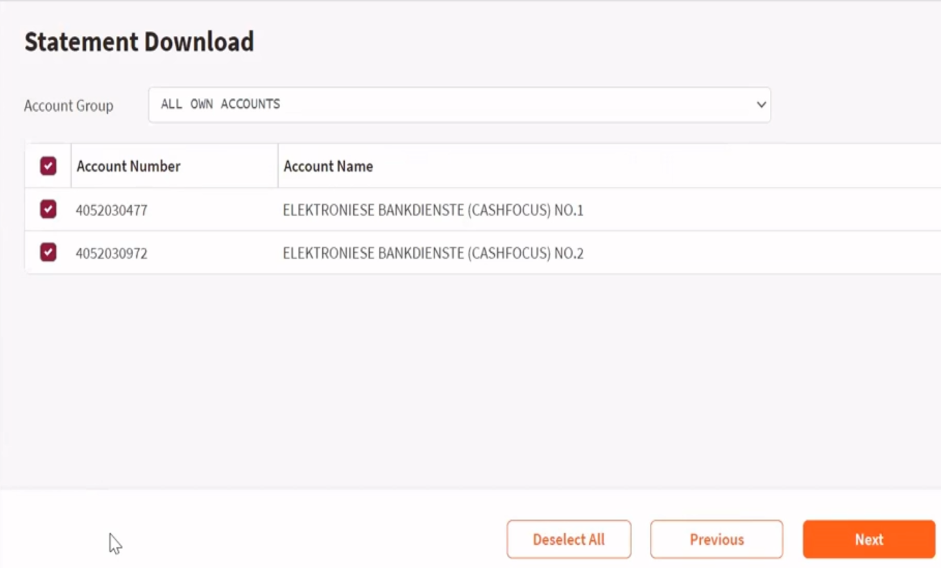
- Next, select All Own Accounts.
2.2. Upload Cashbook on WeconnectU
Navigation: Global Overview > Finance > Cashbook
On the Cashbook landing page, select Cashbook Option located on the far right of the screen.

- From the drop-down menu, click on Upload Cashbook, and select the ABSA Business Integrator, or TPFA.
- Upload the file retrieved from ABSA Bank.
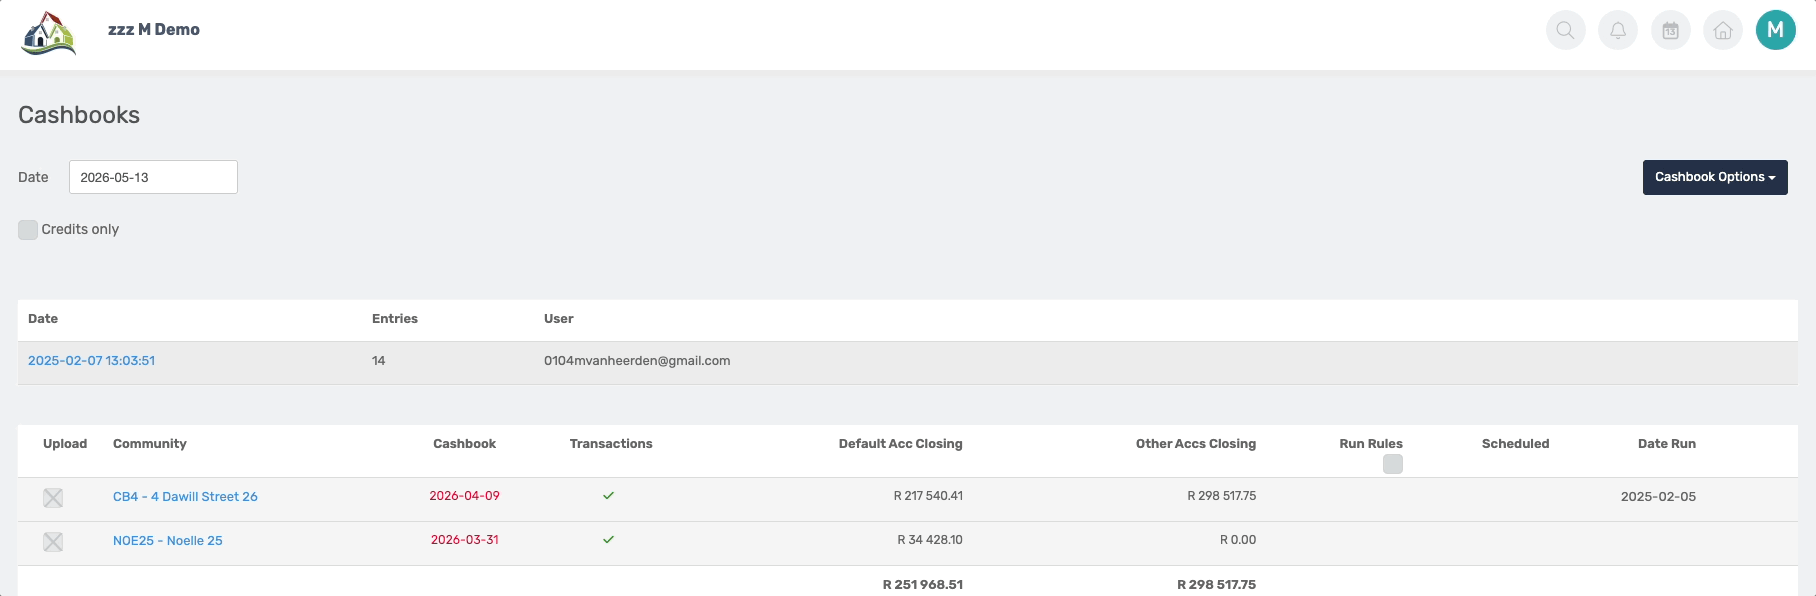
- Lastly, check for duplicates, and click on Submit.
3. Export Supplier Payments
Supplier invoices must first be created within the Solution and authorised by the relevant Business User or Trustees/Directors before processing can continue. Click here to view the how to guide on Supplier Invoices.
3.1. Export Function
Navigation: Global Overview > Finance > Payments
On the Payment landing page, select Export Payments located at the top right of the page.

- A list of all authorised Payments will be displayed, from which the required Payments can be selected for export and processing.
Note: An Excel file containing all authorised and selected payments will be downloaded, which can then be uploaded to ABSA Bank for processing. |
3.2. Upload to ABSA
Navigation: ABSA Login > Payments
On the Payments landing page on ABSA, follow the steps below:
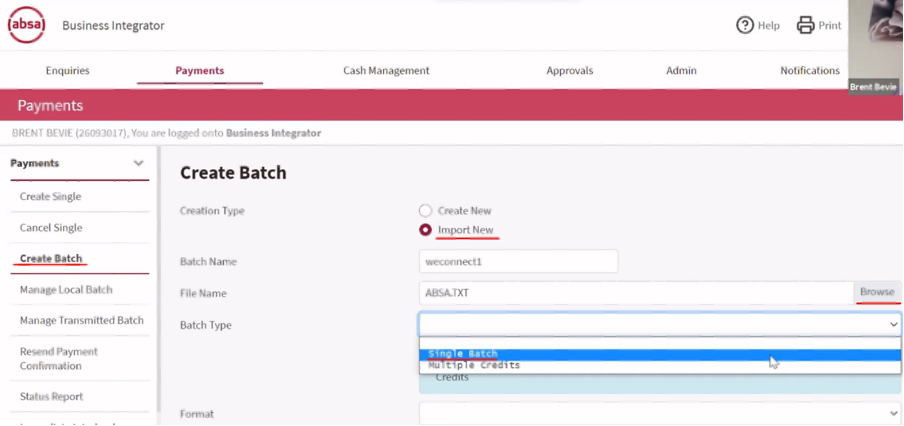
- Select the Import New tick box.
- Name the Batch accordingly
- Click on Browse to upload the batch file
- Select Single Batch from the Batch type drop-down
- Format: TRASNFEREXC
- Delimiter Specification: Field
- Field Specification: Fixed Field Lenght
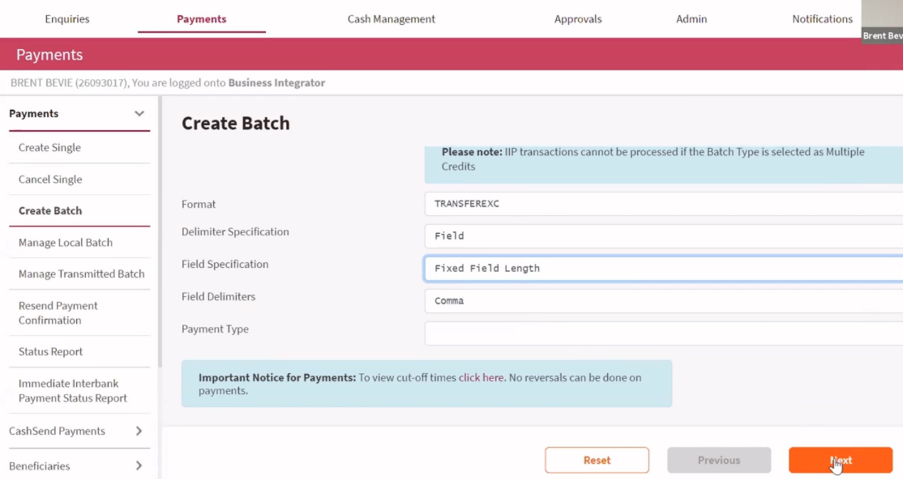
From here, click next on the pages to follow, until the Payment Validation Report page. Ensure that all the information on this report is correct.
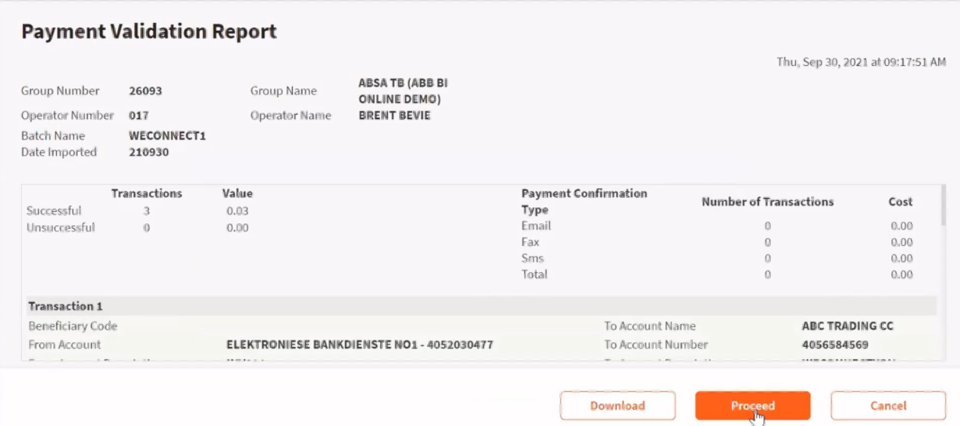
Once Proceed has been selected, the batch will move to an Awaiting Approval status. Navigate to Manage Local Batch.
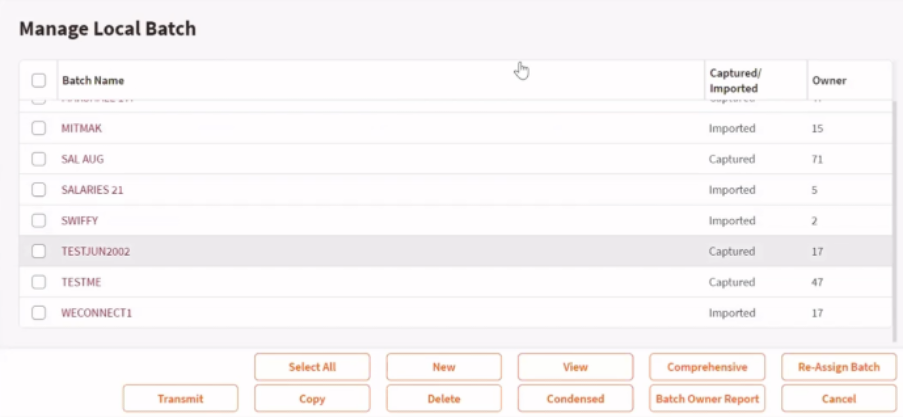
On this page, the relevant batch can be viewed and transmitted for final approval.
To submit and approve the Payments, the authorised individual can log in, navigate to Manage Transmitted batches, and select Approve.
Resources: CMS - Bulk Banking How to Article |
Was this article helpful?
That’s Great!
Thank you for your feedback
Sorry! We couldn't be helpful
Thank you for your feedback
Feedback sent
We appreciate your effort and will try to fix the article