1. Uploading Bank Statement
Navigation: Community Level > Finances > General > Cashbook
If this is the very first bank statement upload, this is usually indicated by the last upload date stating 1970-01-01.

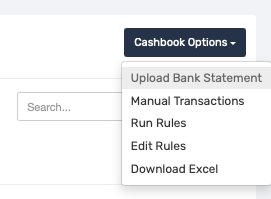
Click the Cashbook Options button, and from the drop-down menu, select Upload Bank Statement.
If this is the first bank statement being uploaded for this cashbook, select Create New template From This File. Then click Select Bank Statement file and choose the CSV bank statement to be uploaded.
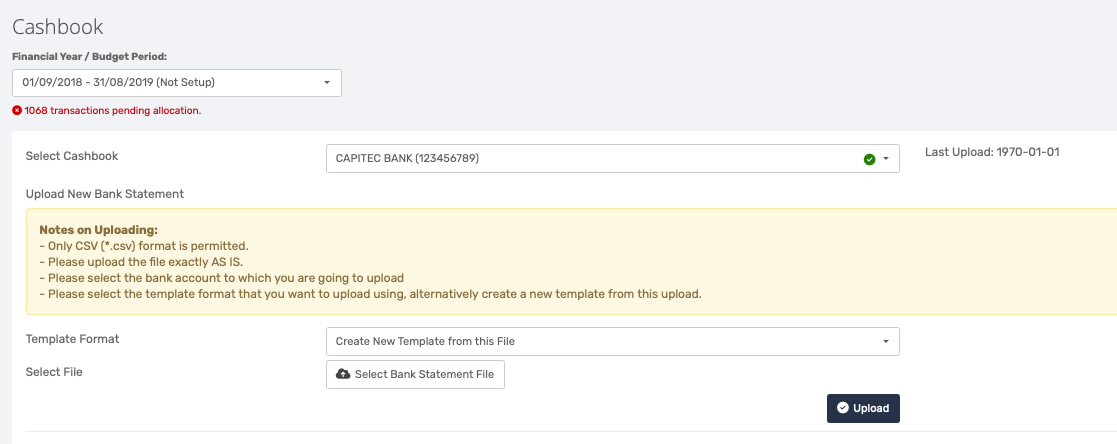
Important: Only CSV (*.csv) format is permitted. Please upload the file exactly as. It is recommended that the file is not opened before uploading it to the system. Once statements are opened, the system might not validate the file upon upload. |
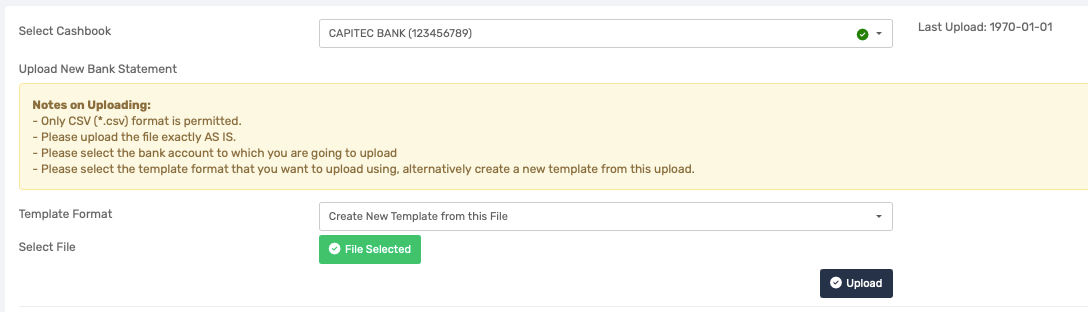
Once the file has been uploaded, the button will turn green. This will indicate that the file is now ready to be uploaded.
1.1. Create a Template
Once the bank statement has been selected and the upload has been clicked, the following screen will appear.
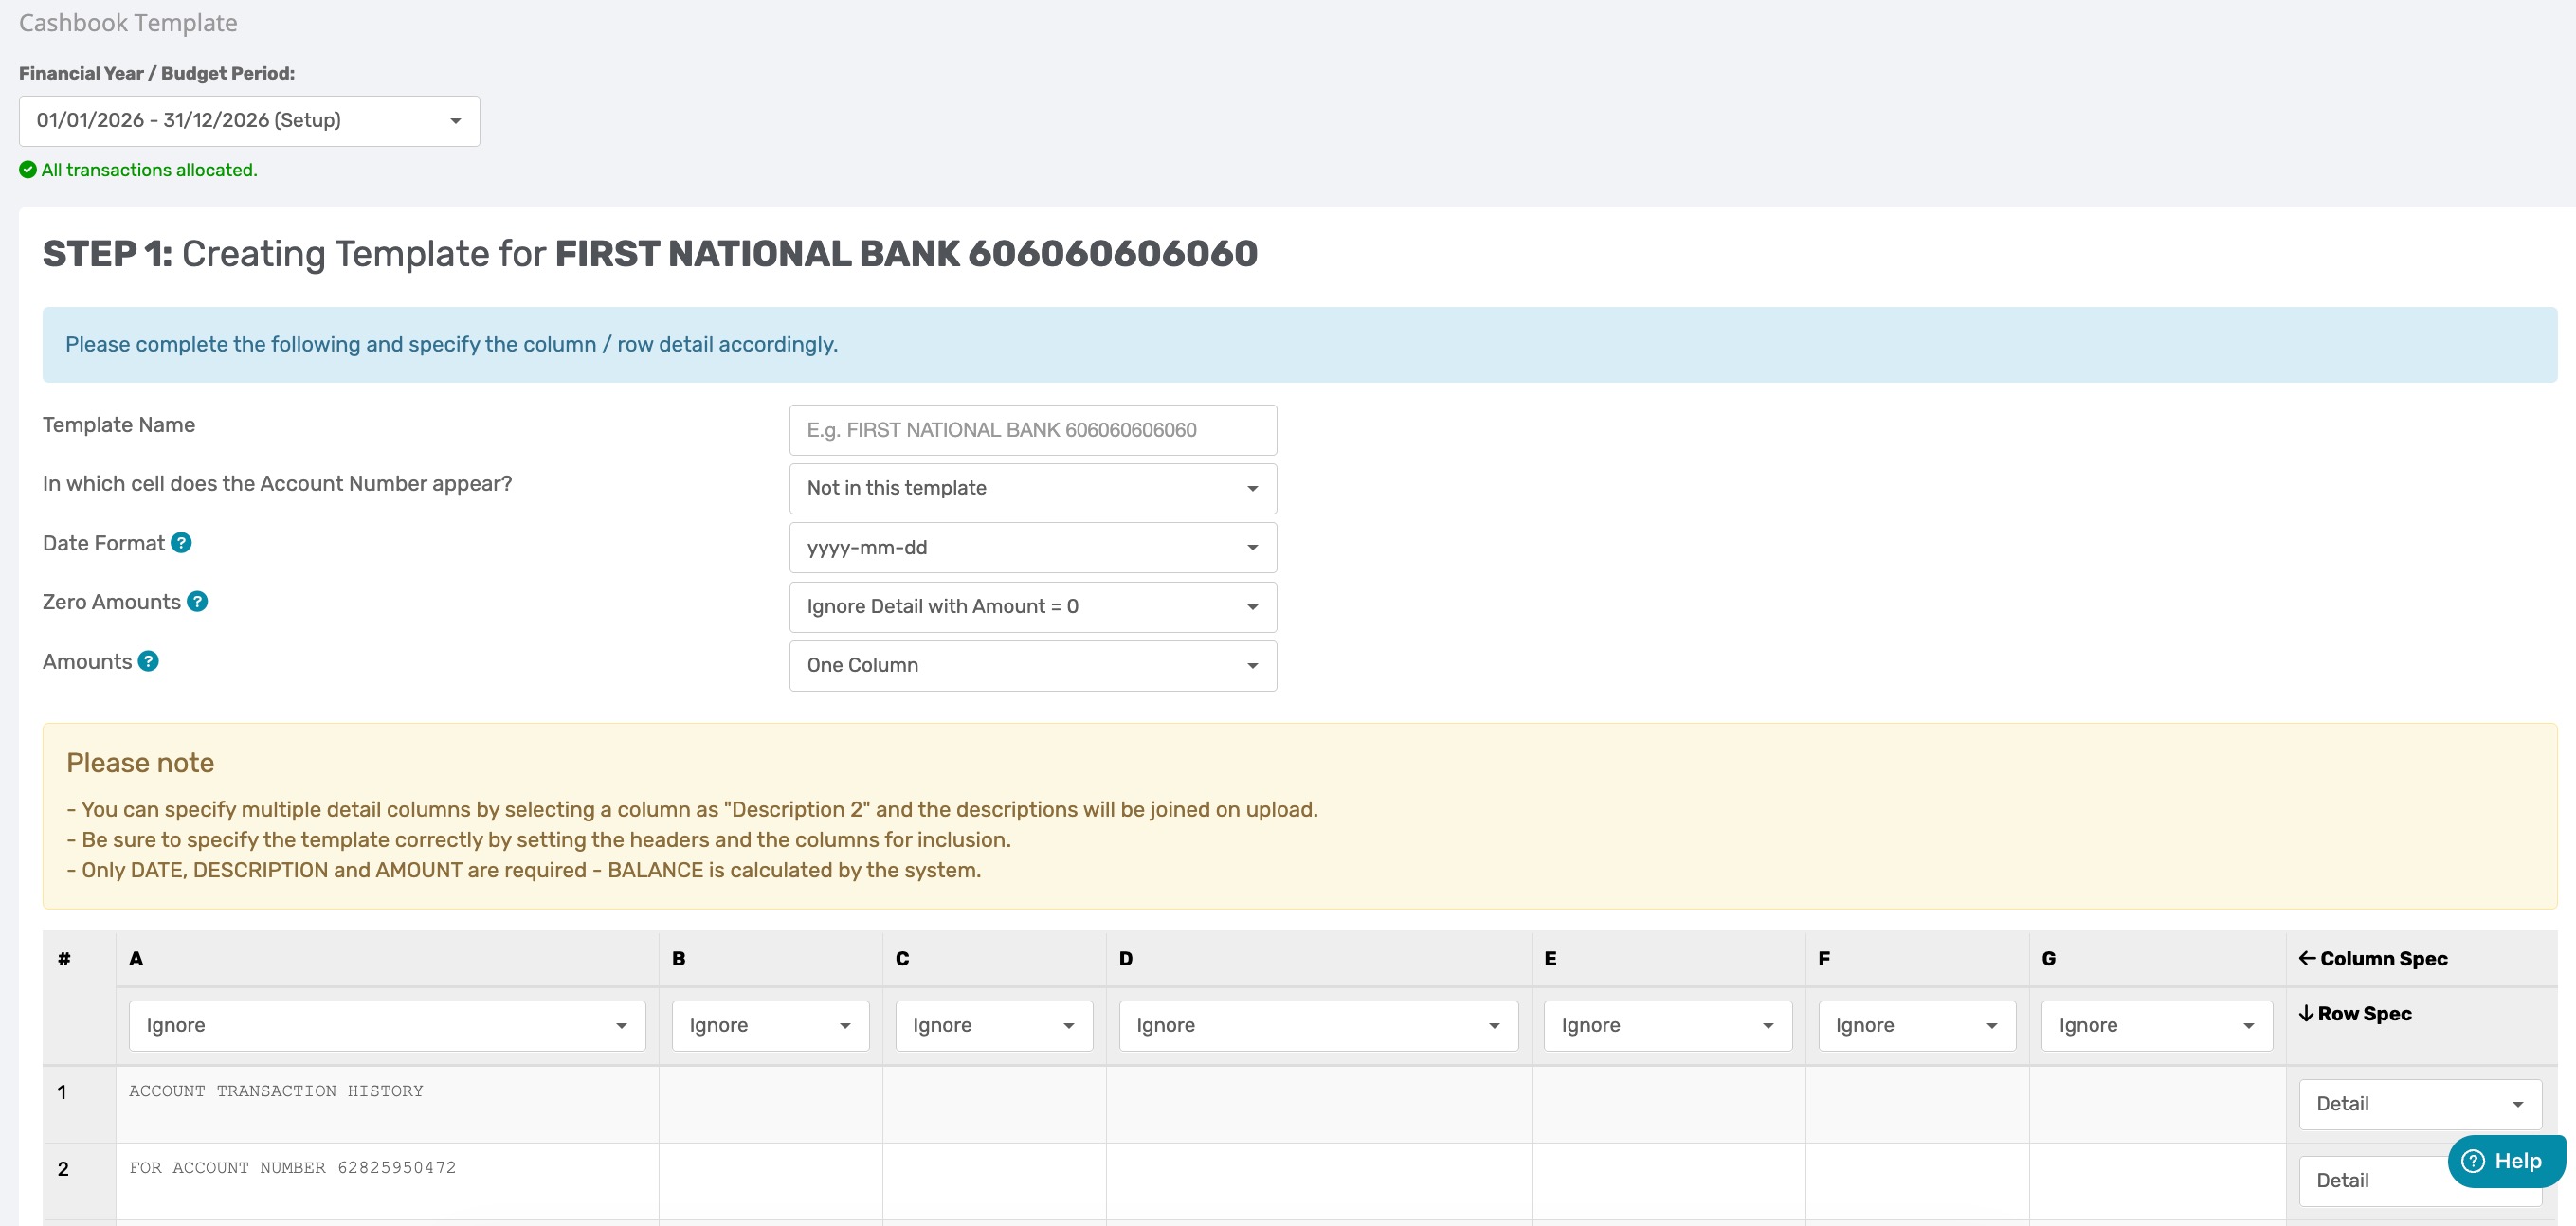
1.1.1 Naming the Template
- Template name: Create a name for the template. The best practice is to copy and paste the bold section of the Bank Name and Account Number.
- In which cell does the Account number appear: If the Account number appears in its' own single cell, without any text, specify in which cell it appears.
Note: This field is recommended to stay on "Not in this template" by default, in case your electronic bank statement file format changes. |
- Date format: Choose the date format exactly as it appears on the electronic bank statement file. To see this, refer to the preview screen on the Solution. The transaction detail within "column A" will show exactly which date format is used in the CSV and thus which format to choose.
- Zero amounts: Choose if Zero Amounts should be brought in or ignored.
- Amounts: Select whether the transaction amounts are all displayed in a single column or split by debits and credits in two columns.
1.1.2 Selecting Columns
The columns must now be mapped to indicate how the Solution should interpret the data in the bank statement. There are only three fields required to create the template.
Date
Amount
Description
- There is an option to add a Description 2 should the statement contain a secondary description
Select Ignore on columns that do not contain any relevant information.
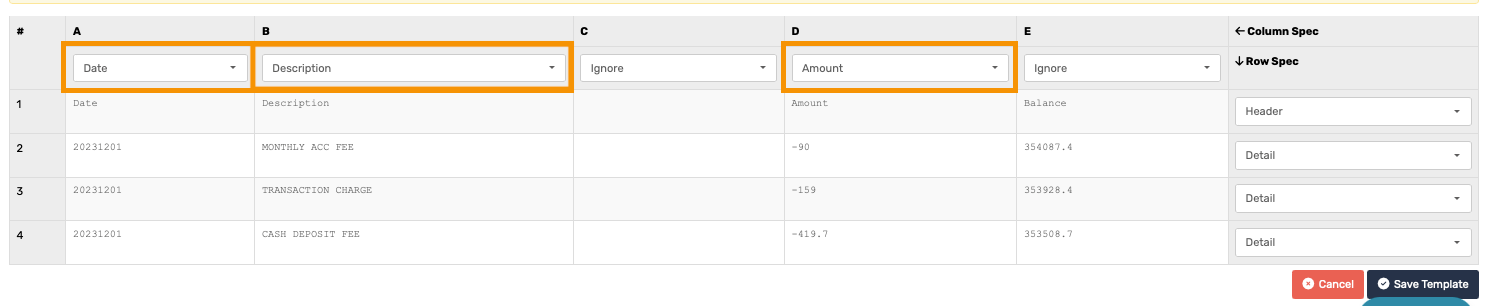
Note: Do not bring in the balance as an amount column as WeconnectU is designed to calculate a balance automatically. |
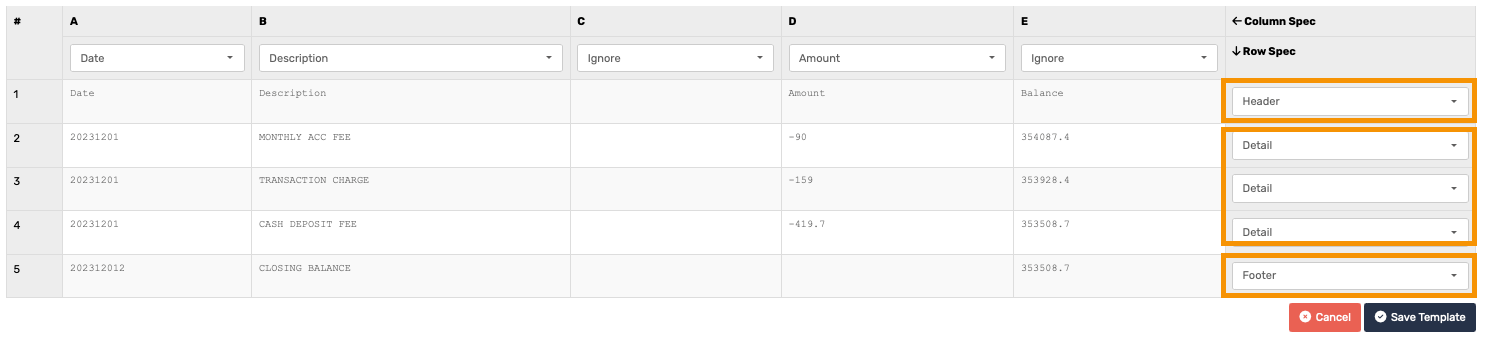
1.1.3 Specifying Rows
Specify which rows can be classified as Header, Detail, and Footer.
- Header - All rows above the first transaction line will be Header.
- Detail - All transaction lines, must contain a Date, Description and Amount.
- Footer - All rows beneath the last transaction will be Footer.
Note: The requirement for a row to be classified as a transaction line must contain a Date, Descriptionand Amount. Only if these three fields are there then this is a detail row spec. |
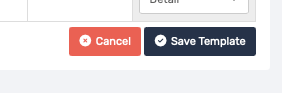
Click on Save Template after all rows and columns have been labelled.
Once the template has been saved, the Solution will automatically redirect to the Confirmation page, where all transactions imported from the bank statement are displayed.
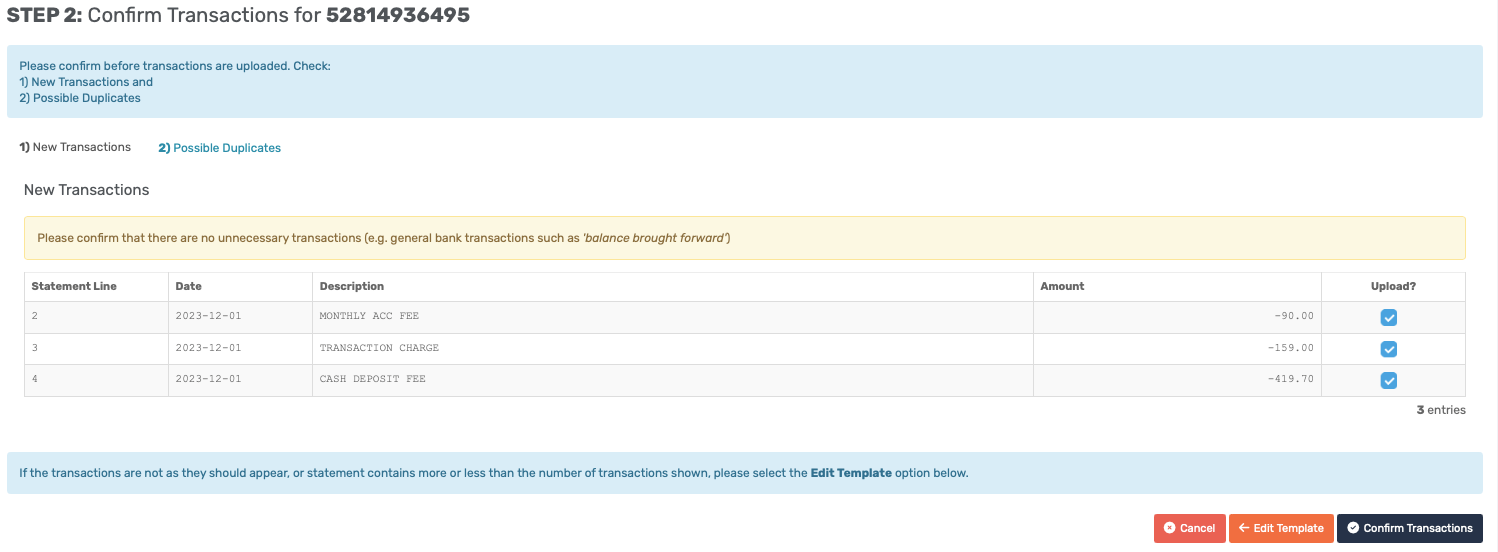
Check through the New transactions and the Possible duplicates tab.
1) New Transactions - These are transactions which the Solution recognises that have not been previously uploaded.

2) Possible Duplicates - here a list will be displayed should the Solution recognise a transaction line as a duplicate. There is still an option to upload the transaction by selecting the toggle box.
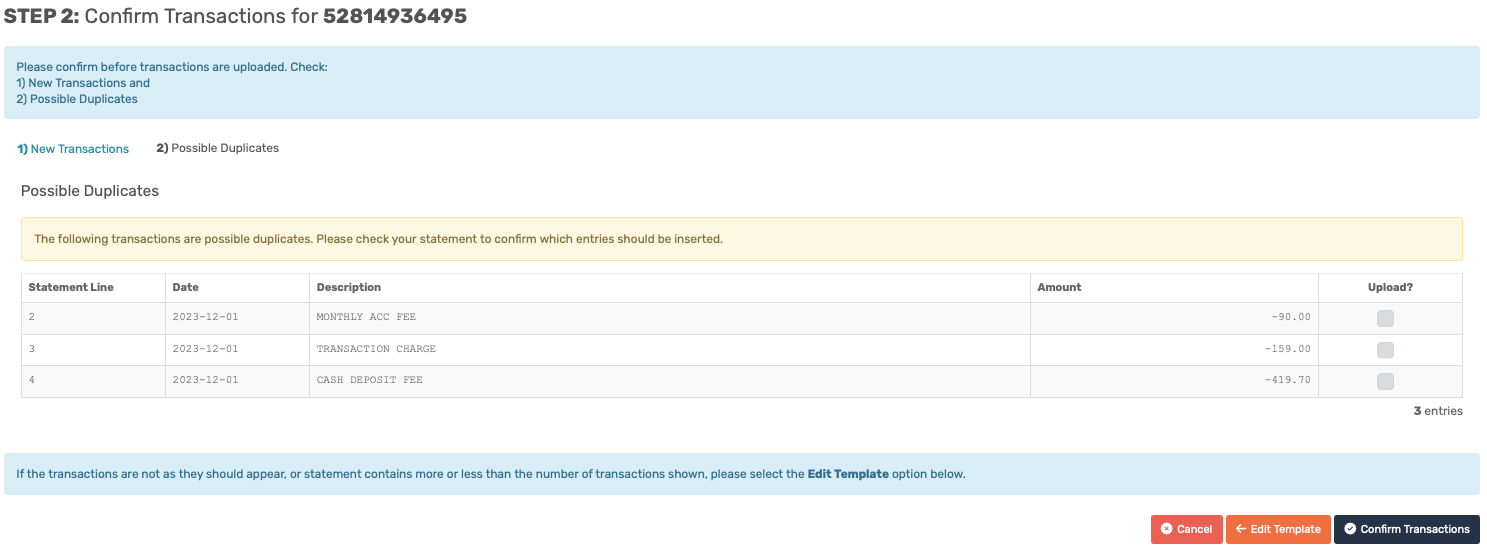
Important: The Solution will pick up duplicate transactions if the date, description, and amount are the same as any transaction that has been uploaded previously. |
Once all the transactions that need to be uploaded are selected, click on Confirm Transactions at the bottom of the page.
Important: There is NO bulk deleting of imported cashbook transaction lines. It will need to be done manually transaction by transaction line. Also note that to delete a transaction line the necessary permission must be granted. |
Resources: CMS - How to Upload Transaction Video |
Was this article helpful?
That’s Great!
Thank you for your feedback
Sorry! We couldn't be helpful
Thank you for your feedback
Feedback sent
We appreciate your effort and will try to fix the article