Once the Task Migration process has been completed, the Task and Compliance Setup can be managed within the new Tasks and Compliance experience.
The Next Generation Tasks & Compliance Setup allows the required recurring Compliance items and Categories to be configured at a Global Level. Completing these setups ensures that Compliance tasks are correctly assigned, scheduled, and categorised across the relevant Communities.
The following setups need to be completed:
1. Global Recurring Setup
2. Subcategory Setup
1. Recurring Setup
Navigation: Global Overview > Settings > Task Setup > Recurring Setup
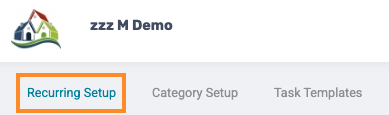
Manage all recurring compliance items from this page.
1.1. Adding Recurring Item
Complete the following fields:
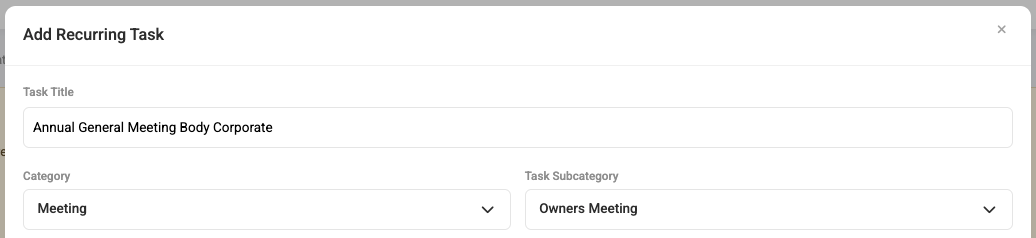
- Task Title: Enter a clear and descriptive title for the Task.
- Task Category & type: Select the appropriate Category & Type to define the nature and purpose of the Task.
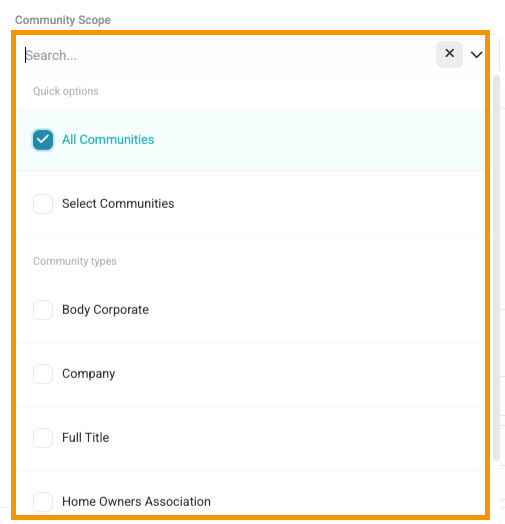
- Community Scope: Select the Communities to which the Compliance item applies. (All/ Specific/ Body Corporate. Homeowners Association).
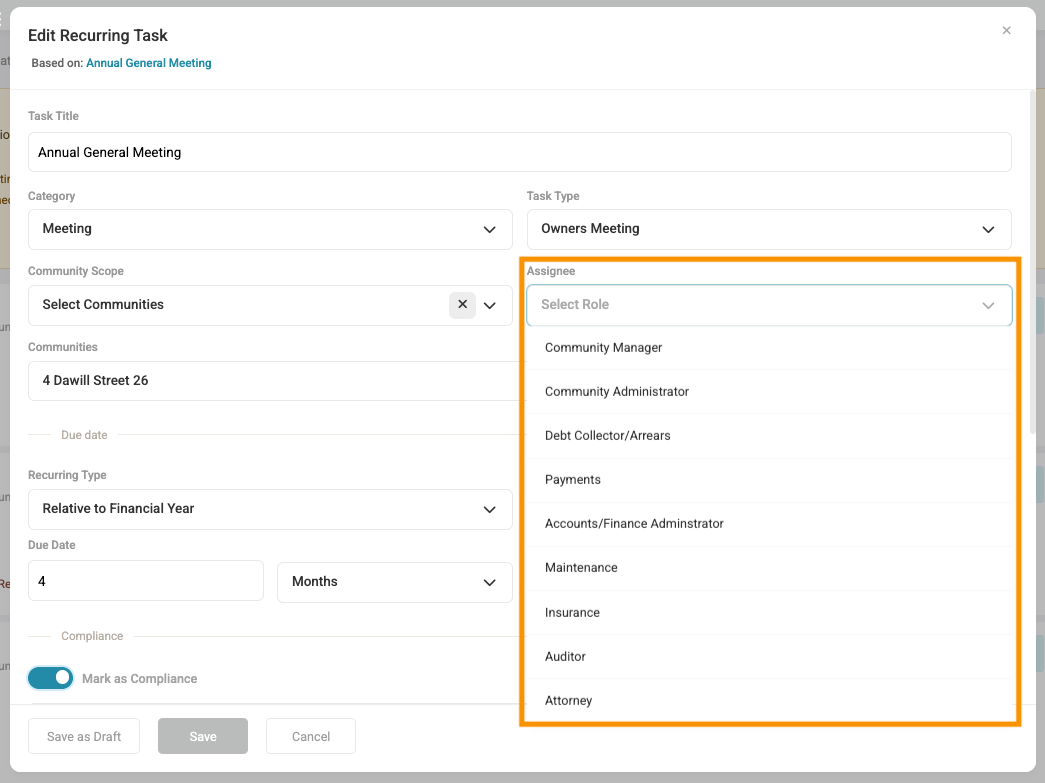
- Assignee: Select the person responsible for completing the Compliance task. Community Roles can also be selected, if setup.
- Recurring Type: Select the frequency at which the Task should recur: Yearly/ Monthly/ Weekly/ Etc.
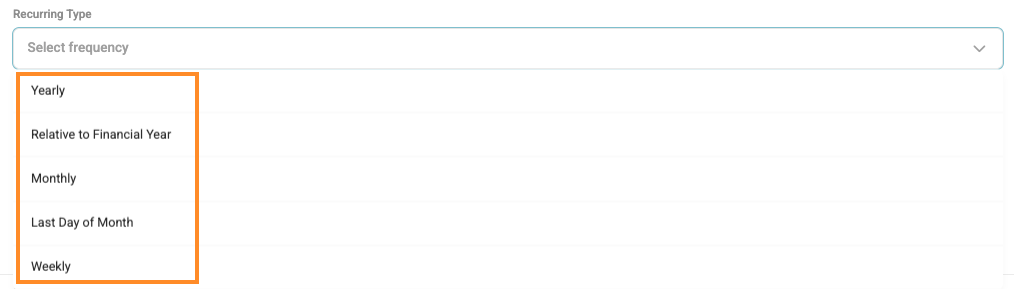
- Due Date: When setting up a Recurring Task, it is important to specify both the Due Date and the End Date.
- Due Date: The date by which the task must be completed.
- End Date: The date on which the recurring task should stop generating new tasks.
Ensure that both dates are correctly configured to ensure the recurring task runs for the required period.
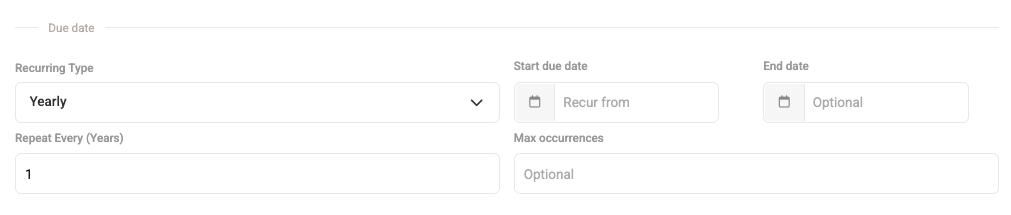
- Repeat Every (Years): Enter how often the item should recur, based on the number of years. For example, Valuations needs to occur every three years.

- Compliance Item: Determine whether the item should contribute to the Compliance Score. Select Mark as Compliance checkbox if the item is a legally required action that must be completed.
- Compliance Criteria: Select whether the requirement is to Upload a Document, and/ or Marking the task as complete. Where document upload is required, select the Document folder it should post to.

- Checklist items: Ensure that all required checklist items are included. An assignee can be selected for each checklist item.
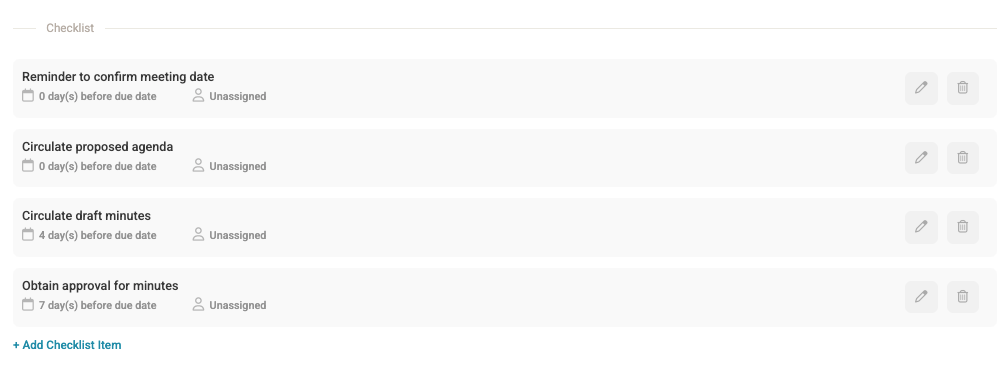
Note: All amendments done on the Global Setup will pull through to the item on the Community Level. If a Compliance item for one Community, such as an AGM, requires a different checklist item from other Communities, it is recommended to log into the relevant Community, open the recurring Compliance Task item under Manage Tasks, and add the checklist directly to that task. |
To create the task, select Create in the bottom-left corner. The task will be created, and the assignee will be notified via email.
Once created, all checklist items will be available under the Active Tasks tab for completion.
Alternatively, the task can be saved as a Draft by selecting Save as Draft in the bottom-left corner.
A task saved as a draft will not be visible or reflected in the Community until it has been created.

1.2. Editing, or Deleting a Recurring item
1.2.1. Editing a Recurring Item
Select the Recurring Item under Settings > Task Setup. The Task Card will open, allowing the required information to be reviewed and updated.
Note: The Recurring Type of an existing setup should not be changed, as this may affect the accuracy of the data and disrupt the existing recurring series. If the recurring frequency needs to be changed, the existing setup should be ended, and a new setup should be created with the required Recurring Type. This ensures that the recurring series and associated data remain accurate. To end a recurring task, update the Due Date to a date in the past. This will stop the recurring task from generating further instances.
|

1.2.2. Deleting a Recurring Item
Recurring Tasks can only be deleted at a Global Level.
Navigate to Global > Settings > Task Setup, then select the three-dot menu on the right-hand side of the relevant Recurring Task.

2. Category Setup
Navigation: Global Overview > Settings > Task Setup > Category Setup
A list of all pre-populated Categories will be displayed.
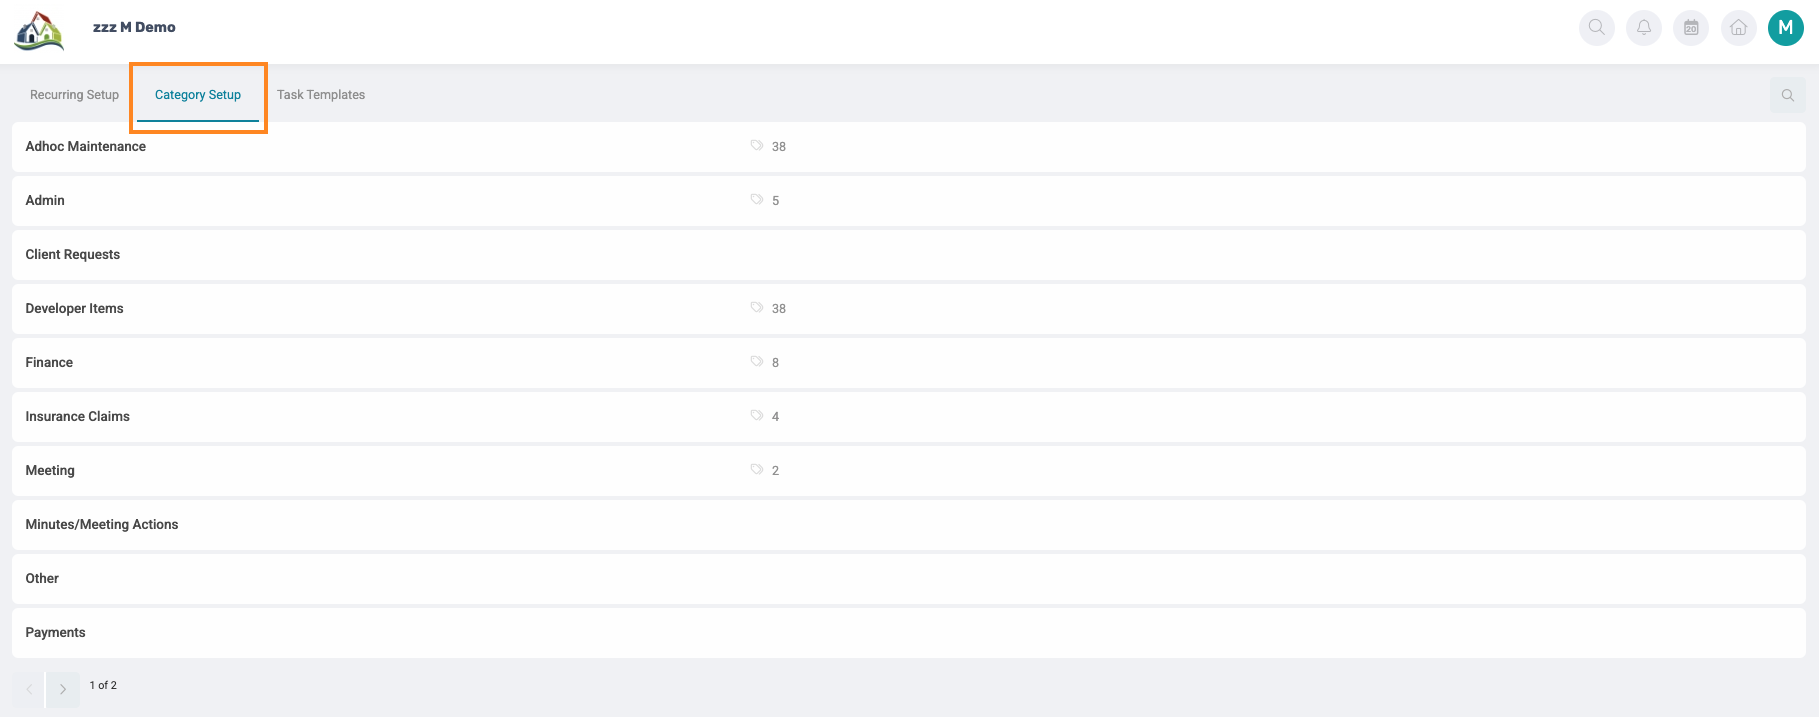
Note: Main Categories are Solution-defined and cannot be added, edited, or removed. However, Subcategories can be added. |
2.1. Adding Subcategories
Drill into the main Categories by clicking on a category to view the list of Subcategories.
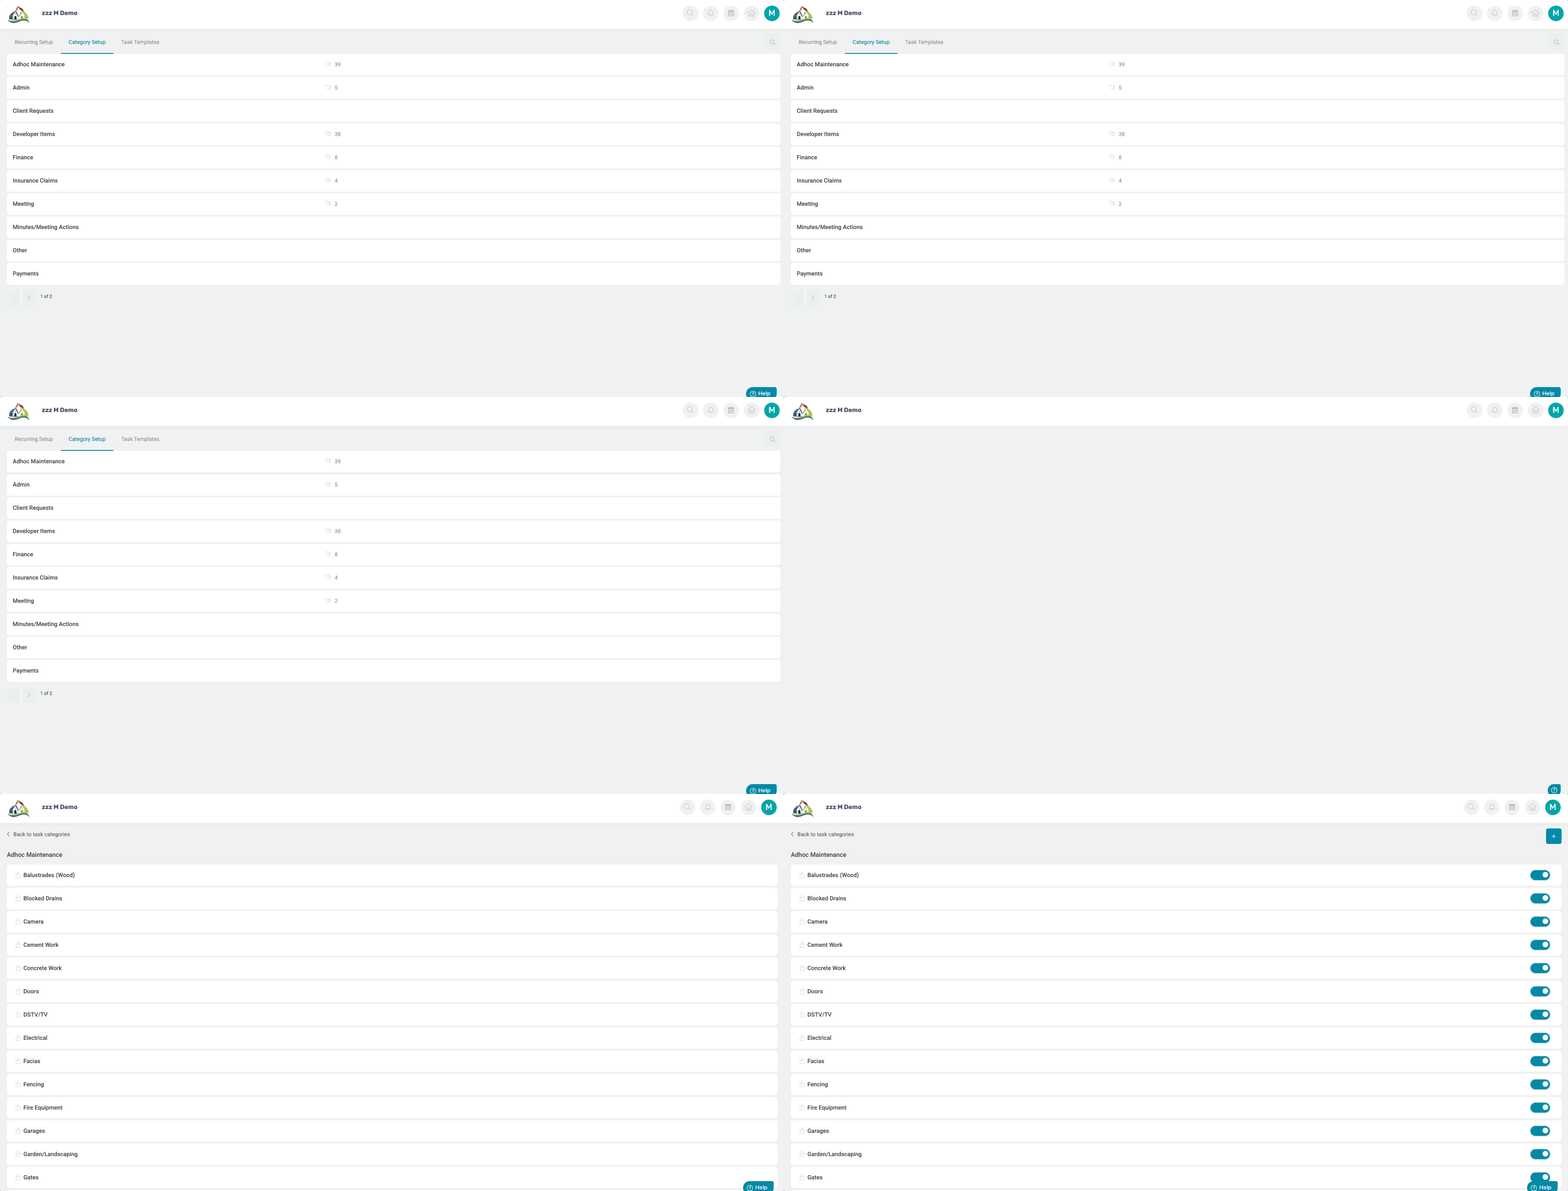
System-generated subcategories can be activated as required by toggling the box on the far right.

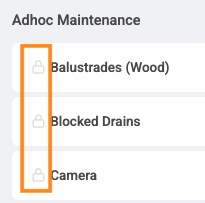
A lock icon indicates that the subcategory is system-generated and cannot be edited.
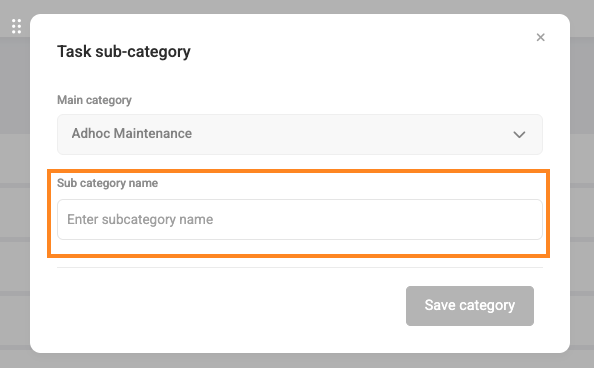
To add a new Subcategory, click the '+' (Plus) icon on the top-right corner.

In the pop-up window, the Main Category name will be displayed, and only the Subcategory name can be entered.
Note: Newly created subcategories can be edited, but not deleted. They can, however, be disabled by toggling the box on the far right.  |
2.2. Editing new Subcategories
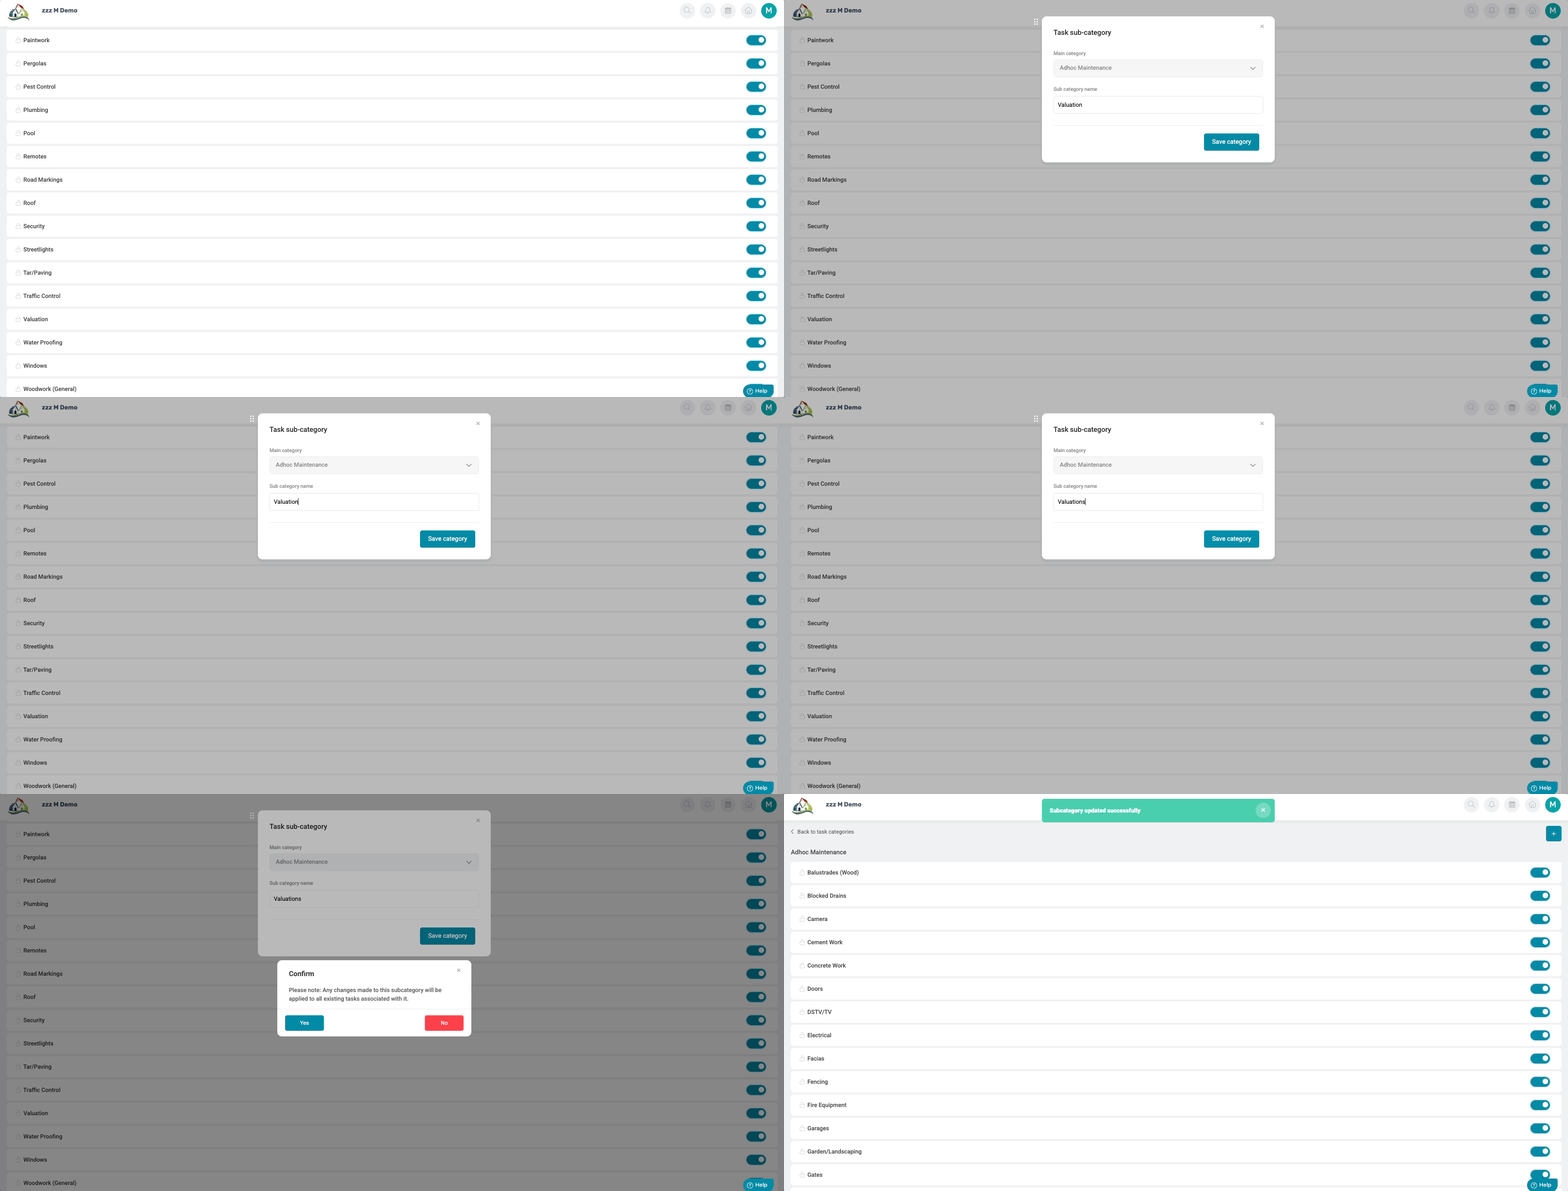
To amend the name of a newly created Subcategory, click on the subcategory name. A pop-up window will appear, allowing the name to be updated.
| Resources | ||
| CMS - Task & Compliance Recurring Setup | ||
| CMS - Task & Compliance Category Setup | ||
| CMS - Task & Compliance Setup Guide | ||
| CMS - Community Roles Guide |
Was this article helpful?
That’s Great!
Thank you for your feedback
Sorry! We couldn't be helpful
Thank you for your feedback
Feedback sent
We appreciate your effort and will try to fix the article